Plan task: system designs
Common questions about how to design a heat pump heating system.
- Why does my total heat loss not equal the sum total of the room heat loss?
- How are radiator outputs calculated?
- How do you select underfloor heating?
- Can I add in different brands of heat pump?
- How is the Outdoor Design Temperature (ODT) set?
- How do I change the Outdoor Design Temperature (ODT) for my project?
- Why is the Outdoor Low Temperature (ODL) not changing after I've amended it?
- How do I factor in intermittent heating?
- Are cascaded heat pumps available in Heatpunk?
- Why have my heat losses changed since the last time I opened the project?
- How can I choose between the 99th and 99.6th percentile outdoor design temperature (ODT)?
Why does my total heat loss not equal the sum total of the room heat loss?
If you are using one of the BS EN 12831-1:2017 methods, the ventilation losses for a building are not a simple sum of the ventilation losses for each room. Instead ventilation losses are calculated both at a room level and then separately on a building (or zone) level.
On the building level, there's an additional factor (fi-z), typically assumed to be 0.5, which makes the building ventilation losses smaller. This is to account for the fact that rooms facing the wind may have cold outside air pushed into them, but then the warm air from those rooms will flow into other internal rooms. This ensures your radiators are large enough for worst-case conditions, while preventing your heat pump from being oversized, which would limit its efficiency.
Read more about ventilation loss calculations here.
How are radiator outputs calculated?
Heatpunk calculates actual radiator outputs with the below formula. This allows us to easily consider differences in flow, return and room temperatures.
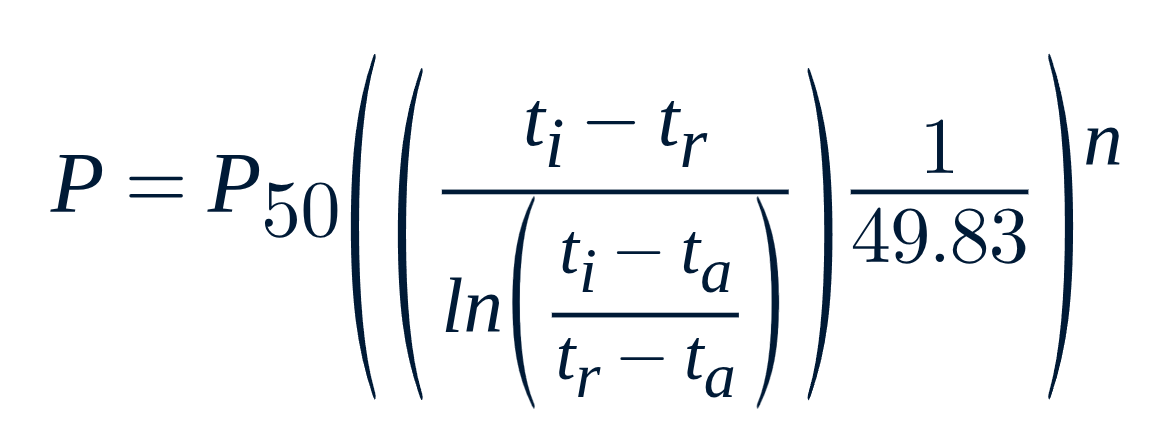
where
P = heat emission from radiator (W, J/s)
P50 = heat emission from radiator with temperature difference 50 oC between the radiator and room(W)
ti = water temperature inlet (oC)
tr = water temperature outlet (oC)
ta = surrounding air temperature (oC)
n = n coefficient
The other way you can calculate radiator outputs is by calculating the correction factor based on temperature differences and the specific radiator being used. This can then be multiplied by the power output given on the datasheet to give the radiator output. To calculate the correction factor you should use the below formula.

where
n = n-coefficient (from radiator datasheet)
trad = mean radiator temperature
troom = room temperature
dT = delta temperature used on the datasheet for the relevant radiator (this is usually 50oC)
In the room breakdown of Heatpunk it should give you the total heat loss of the room and then radiator outputs will be calculated based on the flow temp you have used.
The radiators built into Heatpunk are Stelrad Classic Compacts with Bottom Opposite End connection. If you are using radiators where the outputs differ significantly, you should add them in as a custom radiator. If you are using other varieties of connections for pipework, you must also account for this to ensure the outputs are calculated correctly.
How do you select underfloor heating?
While on the Plan task, from the Emitters sidebar, click the 🡥 icon and then select Add Underfloor Heating which will prompt you to input the floor area covered by the underfloor heating elements and their outputs in W/m2.
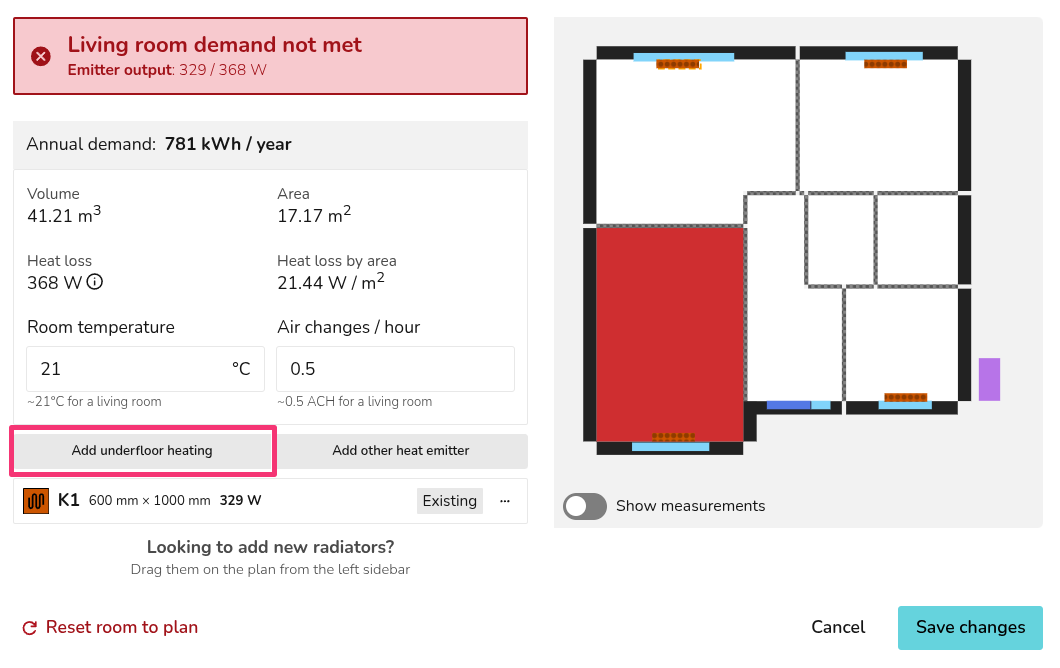
More information and a video can be found on our emitters guide.
Can I add in different brands of heat pump?
You can add in different heat pumps if you have a Heatpunk Pro license. For information on how to do this, see our guide on how to Create and manage your own components.
How is the Outdoor Design Temperature (ODT) set?
The Outdoor Design Temperature (ODT) for your project will be automatically set using the 99th percentile temperature for the relevant project location from the CISBE Design Guide 2026.
Using the 99th percentile temperature means the temperature will only fall below the ODT for 1% of the year. You may instead choose to use the 99.6th percentile in which case no additional uplift is needed for intermittent heating or exposed locations (see MIS 3005-D).
Using the project's location and 99th percentile, Heatpunk will also automatically subtract 0.3°C from the ODT for every 50 m above sea level.
Want to use a different ODT? Find out how to change the ODT here.
How do I change the Outdoor Design Temperature (ODT) for my project?
heatpunk.co.ukThis guide applies to Heatpunk UK.
To change the ODT, follow these steps:
Note this will not affect the Outdoor Low Temperature (ODL) used in the performance task. Read here for more information.
- Navigate to the Plans task for your project.
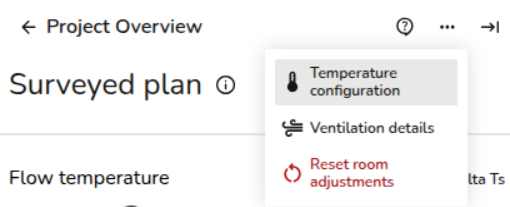
- Click the 3 dots in the top right hand corner to view more options. Select temperature configuration.

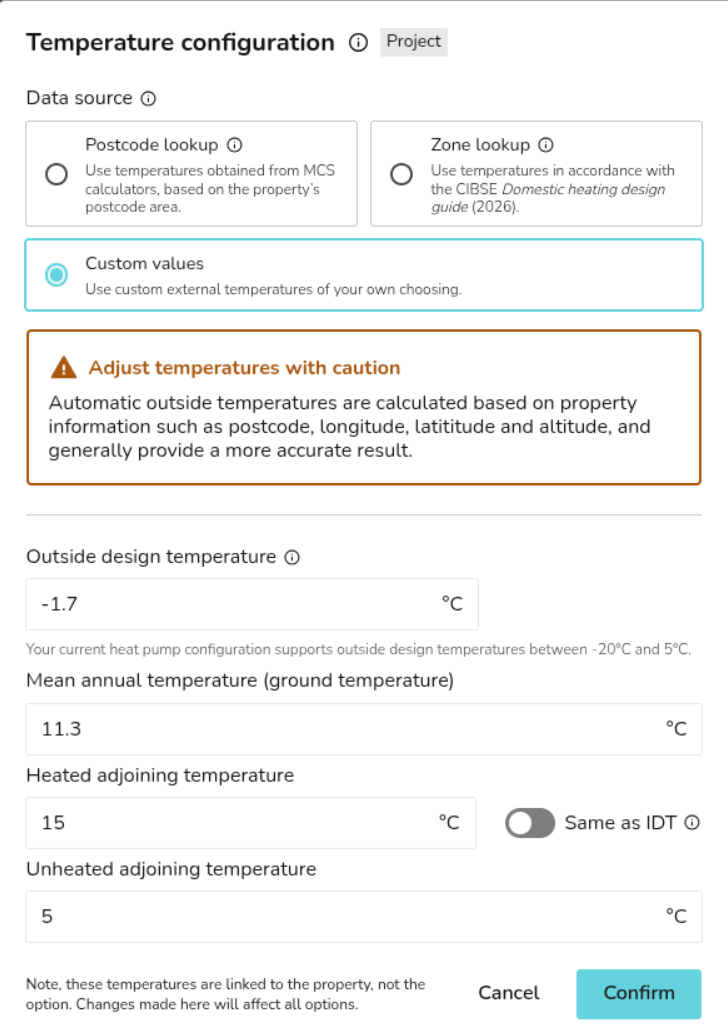
- You can choose between postcode lookup (default option, recommended for most accurate result), zone lookup or a custom ODT (for extreme environments).

- If postcode or zone lookup are selected, you can use the toggle to change between the 99th (default option) or 99.6th percentile. This means that the ODT will not be lower than this value 99% or 99.6% of the time, respectively.


Find out more about the ODT and how it is automatically set here.
Find out more about how to choose between the 99th or 99.6th percentile ODT here.
Note that the Channel Islands Jersey and Guernsey do not have a CISBE zone, so the zone lookup method will not be suitable. The postcode lookup method will work even if the Islands are not shown on the map.
An additional 0.3°C will need to be removed for every 50 m above sea level, with altitude given in the input section of the technical report & customer proposal.
Why is the Outdoor Low Temperature (ODL) not changing after I've amended it?
Changing the Outdoor Design Temperature (ODT) does not affect the Outdoor Low Temperature (ODL) used in the performance task. This task is based on MCS 031, which states the the ODL from Appendix A must be used. MCS 031 Appendix A is equivalent to the 99.6th percentile from MIS 3005 D.
The ODL is not the same as the ODT used for the design, which you may adjust within MCS rules stated in MIS 3005 D.
Read here for info on how Heatpunk sets the ODT.
How do I factor in intermittent heating?
Heatpunk assumes continuous heating when determining the ODT and sizing the heat pump.
If the property will be heated intermittently, you can change the ODT (in line with MIS 3005-d) to the 99.6th percentile and no uplift factor will be required. Read here to see what the 99.6th percentile is for your area, note that you will also need to subtract 0.3 degrees for each 50m above sea level.
Are cascaded heat pumps available in Heatpunk?
Yes, you can simply drag multiple heat pumps - as many as you need - into the floor plan to create a cascaded system.
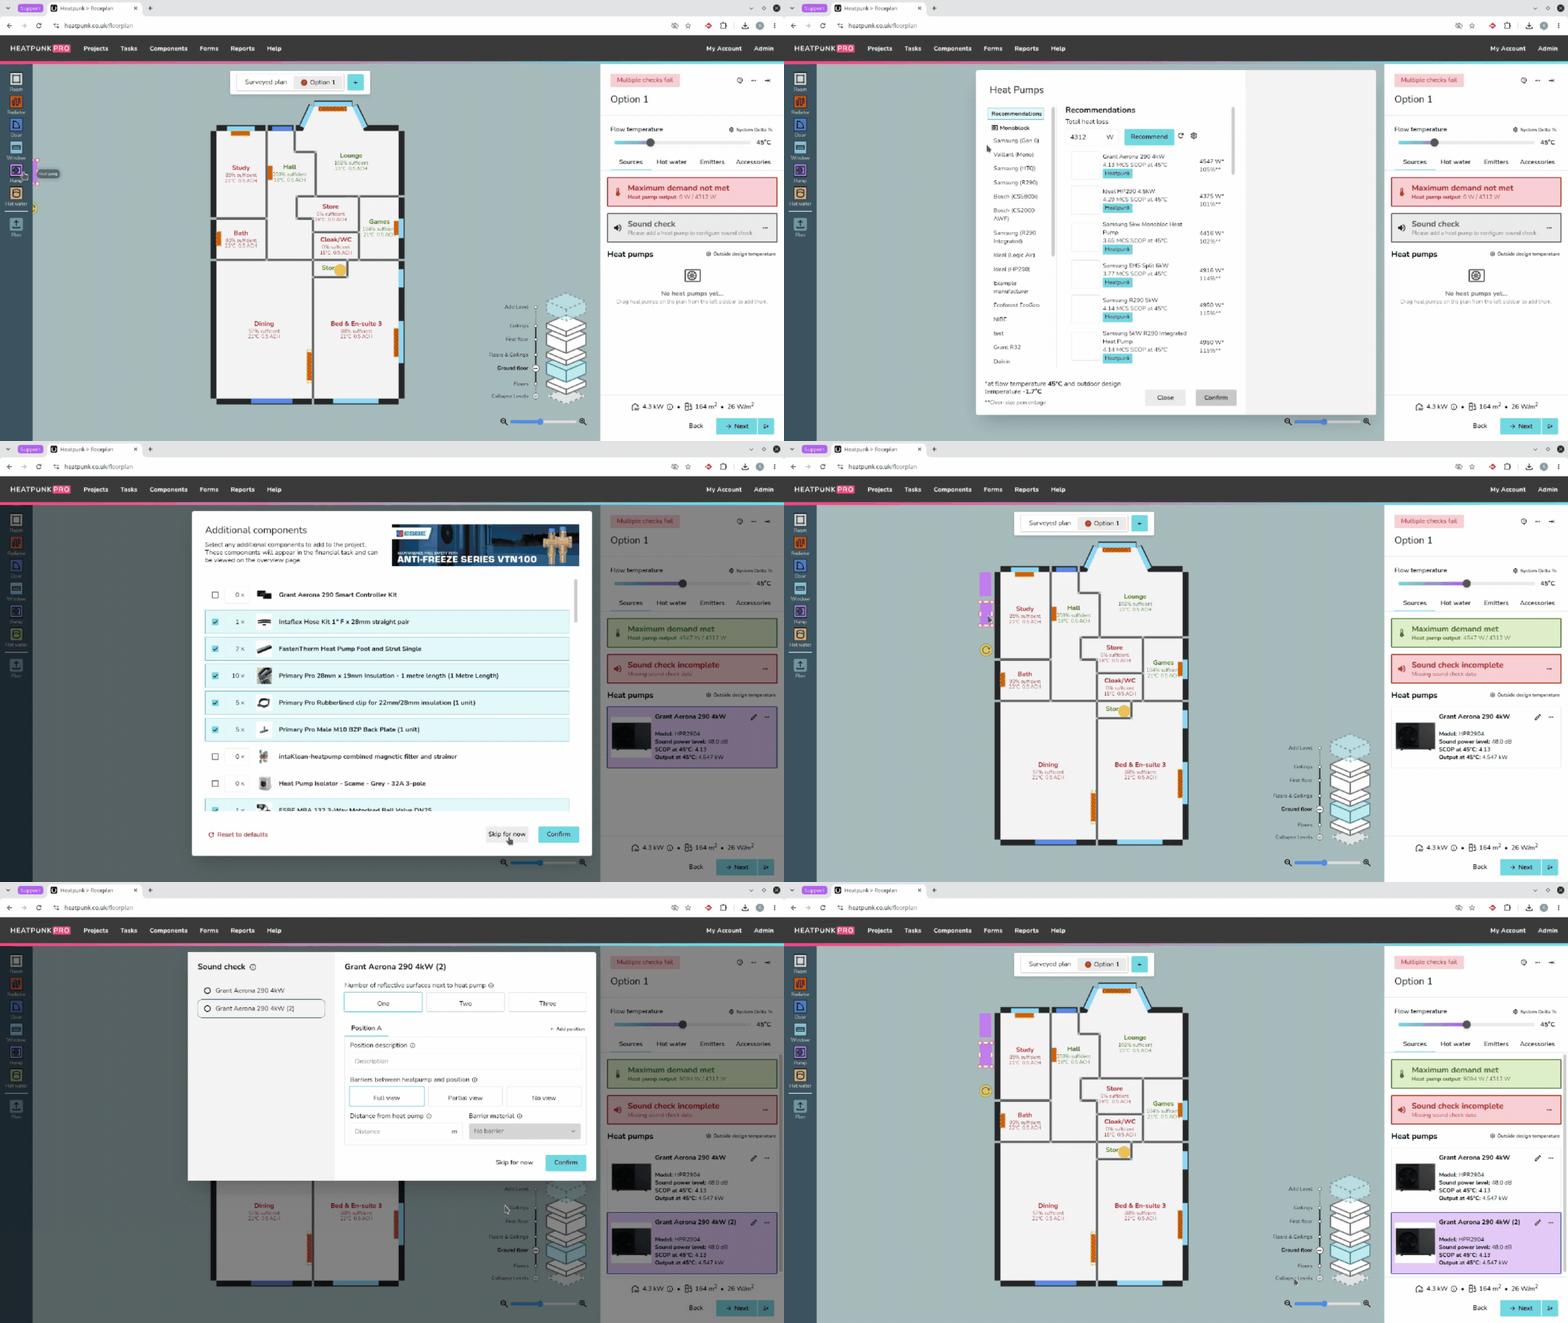
Find out more about creating floor plans here.
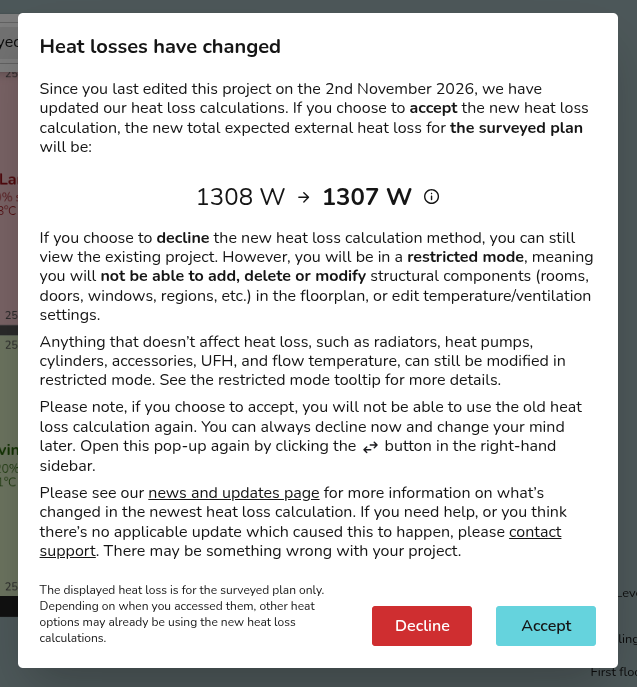
Why have my heat losses changed since the last time I opened the project?
To ensure accuracy, we regularly update our heat loss calculations in line with the latest regulatory guidance and to fix minor software bugs.
Read our recent news and updates to stay up to date with changes.
2nd November 2026: we are updating the default temperatures of heated and unheated spaces in line with new guidance. These updates will automatically be applied to heat loss calculations on new projects. On pre-existing projects, you will have the option to accept the new heat loss calculations, or to view the existing project as it was without making any further changes to the floor plan.
How can I choose between the 99th and 99.6th percentile outdoor design temperature (ODT)?
heatpunk.co.ukThis guide applies to Heatpunk UK.
Choose default for all new projects your Pro team make:
An admin or owner can navigate to Pro Account Settings > Design > view and edit default temperatures.

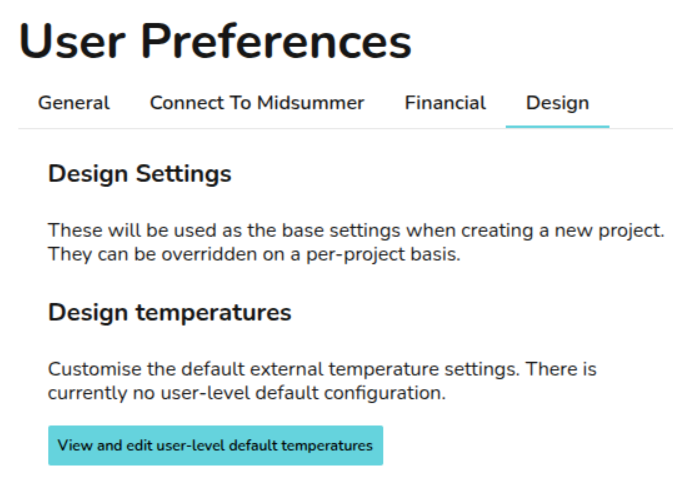
Choose default for all new projects you make as an individual user:
Note: For individual users not in a Pro team, these settings will apply by default to all new projects you create, unless individual project values are adjusted.
Choose setting for one project:
Note: This overrides Team and User settings, letting you change temperatures on a per project basis when needed.
Note: In the Performance task, the outdoor low temperature uses the 99.6th percentile, regardless of which ODT is selected.
Find out more about how the ODT is set.
Find out more about how to change the ODT.