After creating a material (steps below), make sure to **select it on the palette** and star it if you'd like it to be the default material used for that section.
#### Managing custom materials across palettes You can view all custom materials you've created across palettes from within a material palette, in the final section on the left-hand sidebar called *Custom*. Click the three-dot menu on the custom material to **edit**, **clone** or **delete it**. Existing projects are not affected by any changes made here. [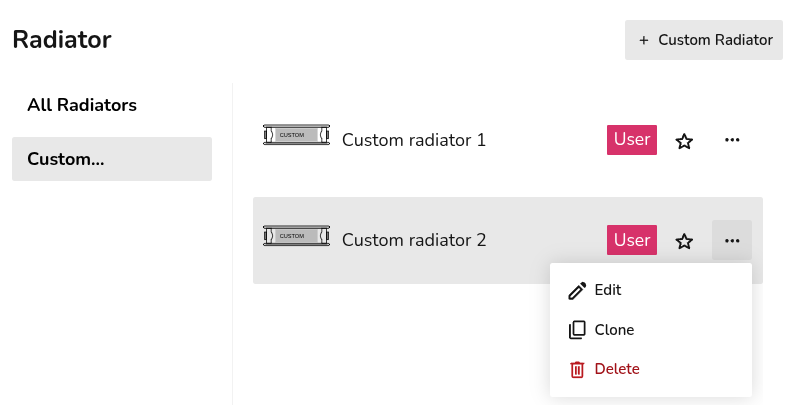](https://help.heatpunk.co.uk/uploads/images/gallery/2026-01/nbxgAZCUYpfJf6J3-image.png)You can only view the custom materials that are within the scope of the palette. For example, if you're creating a team level palette, you will only be able to view team custom materials. Follow the steps below to view and use all custom materials.
When creating a new custom material, you can also **copy the details from existing materials** using the *Copy from* in the top right. Here you will be able to see all custom materials (user and team level) **regardless of the scope of the palette** being viewed. [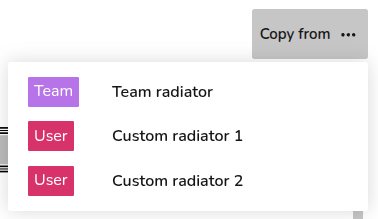](https://help.heatpunk.co.uk/uploads/images/gallery/2026-01/ERnVDmIpsTrMGyhn-image.png) ### Step-by-step #### Custom material using *Build layers* This option is available for custom **walls** and **roofs**: 1. Input the name for the custom material. 2. Select category of material from the drop-down. 3. Select material from the drop-down. 4. Input thickness of that layer. 5. Add row and repeat from step 2 to 4 until each layer is created. 6. Click *Create* in the bottom right. For each layer, Heatpunk will then calculate the k-Factor based on the material and thickness. If you select *Custom* for the material category, you will need to input this k-Factor yourself. The overall thickness and U-value of the material is given at the top. [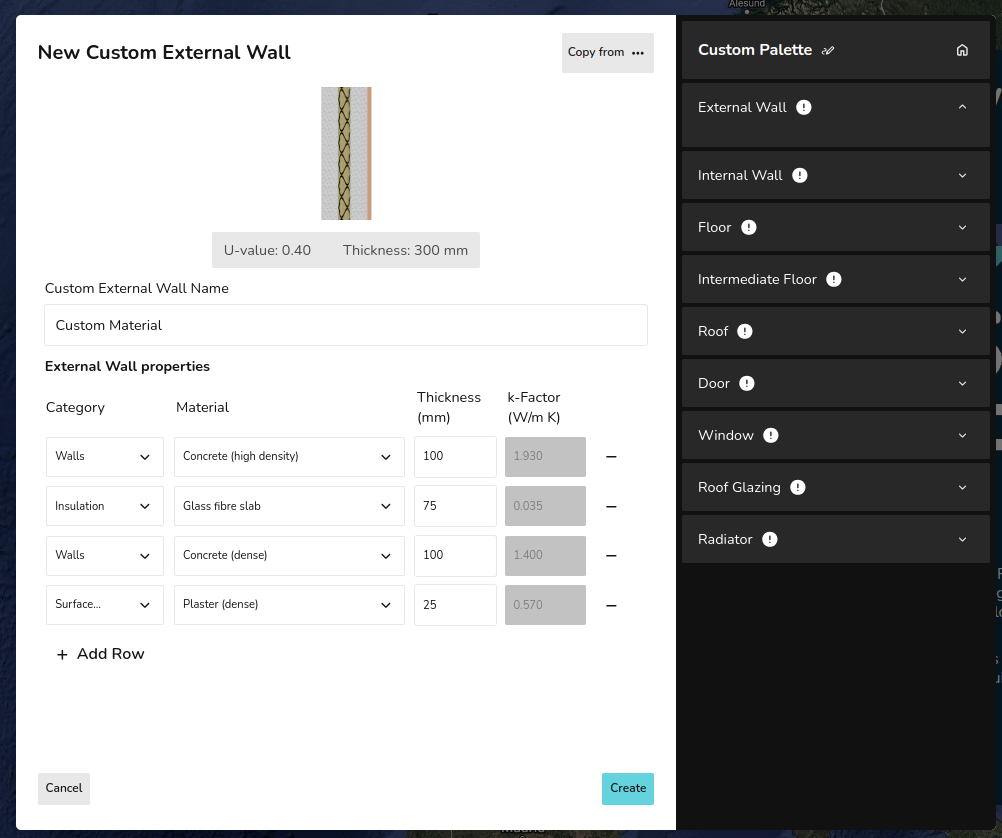](https://help.heatpunk.co.uk/uploads/images/gallery/2026-01/aAeDe6eEAKwUtMBa-image.png) #### Custom material using *Enter U-value* This option is available for all materials (excluding radiators): 1. Input the name for the custom material. 2. Input the U-value and thickness. 3. Click *Create in the bottom right. [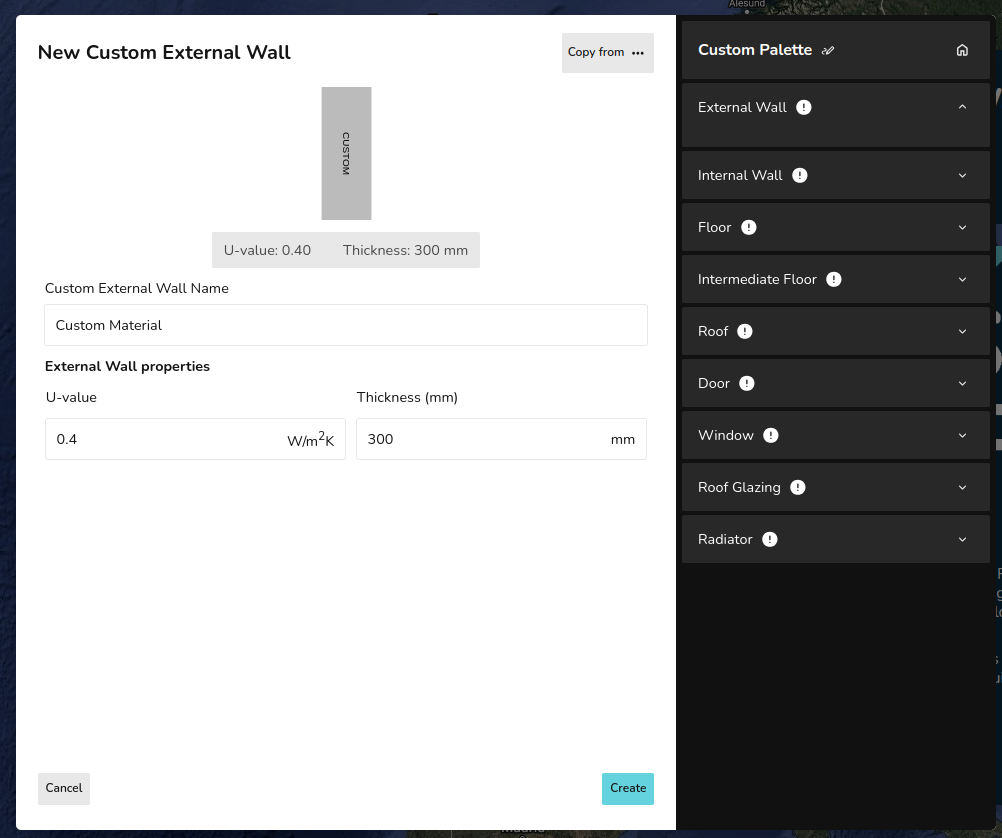](https://help.heatpunk.co.uk/uploads/images/gallery/2026-01/yhwZyCWhaJlyOxiC-image.png) #### Custom radiatorsThe default P+, K1, K2, and K3 radiators in Heatpunk are the Stelrad Classic Compact range. If you are not using these radiators, it's important to create custom radiators so the [outputs](https://help.heatpunk.co.uk/books/faqs/page/how-are-radiator-outputs-calculated) are accurate.
1. Input the name for the custom material. 2. Input the width and height of the radiator. 3. Input the n-coefficient from the datasheet (typically around 1.3) 4. Input the P50 for the corresponding radiator size. 5. Click *Create in the bottom right. [](https://help.heatpunk.co.uk/uploads/images/gallery/2026-01/qRSFY3yDozBnDTuC-image.png) --- If you have further questions, please get in touch at