# Pro: Importing floor plans

<p class="callout info">This feature is only available to users with a Heatpunk Pro subscription.</p>

<span class="corp-icon material-symbols-rounded icon-readmore mceNonEditable" style="user-select: none;">​</span>More information about Pro can be found [here](https://help.heatpunk.co.uk/books/getting-started-with-pro).

### [![Heatpunk floor plan gif.gif](https://help.heatpunk.co.uk/uploads/images/gallery/2025-11/92Ak3RgsEhXEY0U1-heatpunk-floor-plan-gif.gif)](https://help.heatpunk.co.uk/uploads/images/gallery/2025-11/92Ak3RgsEhXEY0U1-heatpunk-floor-plan-gif.gif)

---

## Importing floor plan PDF

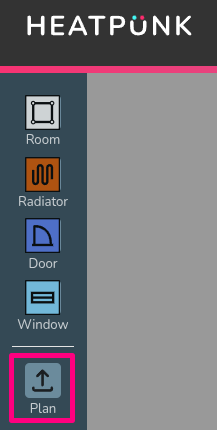
Open an existing project or create a new project and navigate to the floor level you want to upload the plan to. Click on the **plan button** on the left hand side of the page to upload a plan.

[![image.png](https://help.heatpunk.co.uk/uploads/images/gallery/2026-01/scaled-1680-/ykjNoISU5p5QD2TS-image.png)](https://help.heatpunk.co.uk/uploads/images/gallery/2026-01/ykjNoISU5p5QD2TS-image.png)
### Step 1: Upload the floor plan PDF

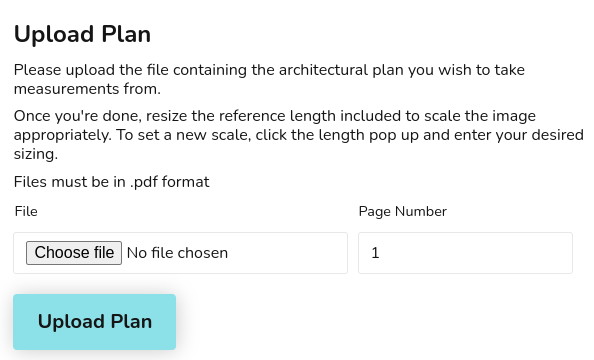
Click *Choose file* to browse the files on your computer. If your file has multiple pages, set the specific page that contains the floor plan you want to use. Click *Upload Plan* to continue.

[![image.png](https://help.heatpunk.co.uk/uploads/images/gallery/2024-11/scaled-1680-/DnWcbKD6cFyvuAfq-image.png)](https://help.heatpunk.co.uk/uploads/images/gallery/2024-11/DnWcbKD6cFyvuAfq-image.png)
<p class="callout warning">For additional levels it's important to align the floor plan with the floor below so heat loss between levels is calculated correctly. See **[Step 4](https://help.heatpunk.co.uk/books/plans-task/page/pro-importing-floor-plans#bkmrk-step-4%3A-repeat-for-a-1)** for how to do this. </p>

### Step 2: Set the scale

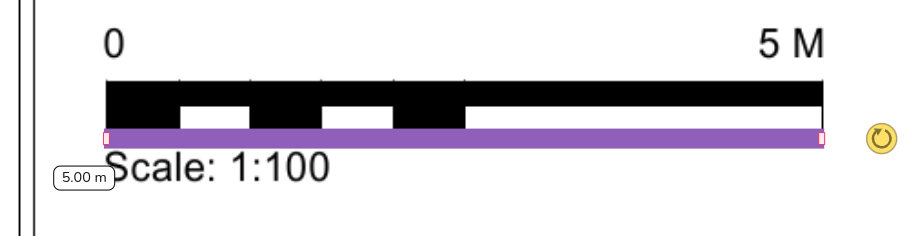
Use the purple reference length bar to set the scale.

1. Drag the reference length bar over to the plans scale or an object of known length.
2. Set the size to match and then click on the dimension to enter the relevant value. [![image.png](https://help.heatpunk.co.uk/uploads/images/gallery/2024-11/scaled-1680-/mp5a4kJXajOakax7-image.png)](https://help.heatpunk.co.uk/uploads/images/gallery/2024-11/mp5a4kJXajOakax7-image.png)
### Step 3: Add rooms to floor plan 

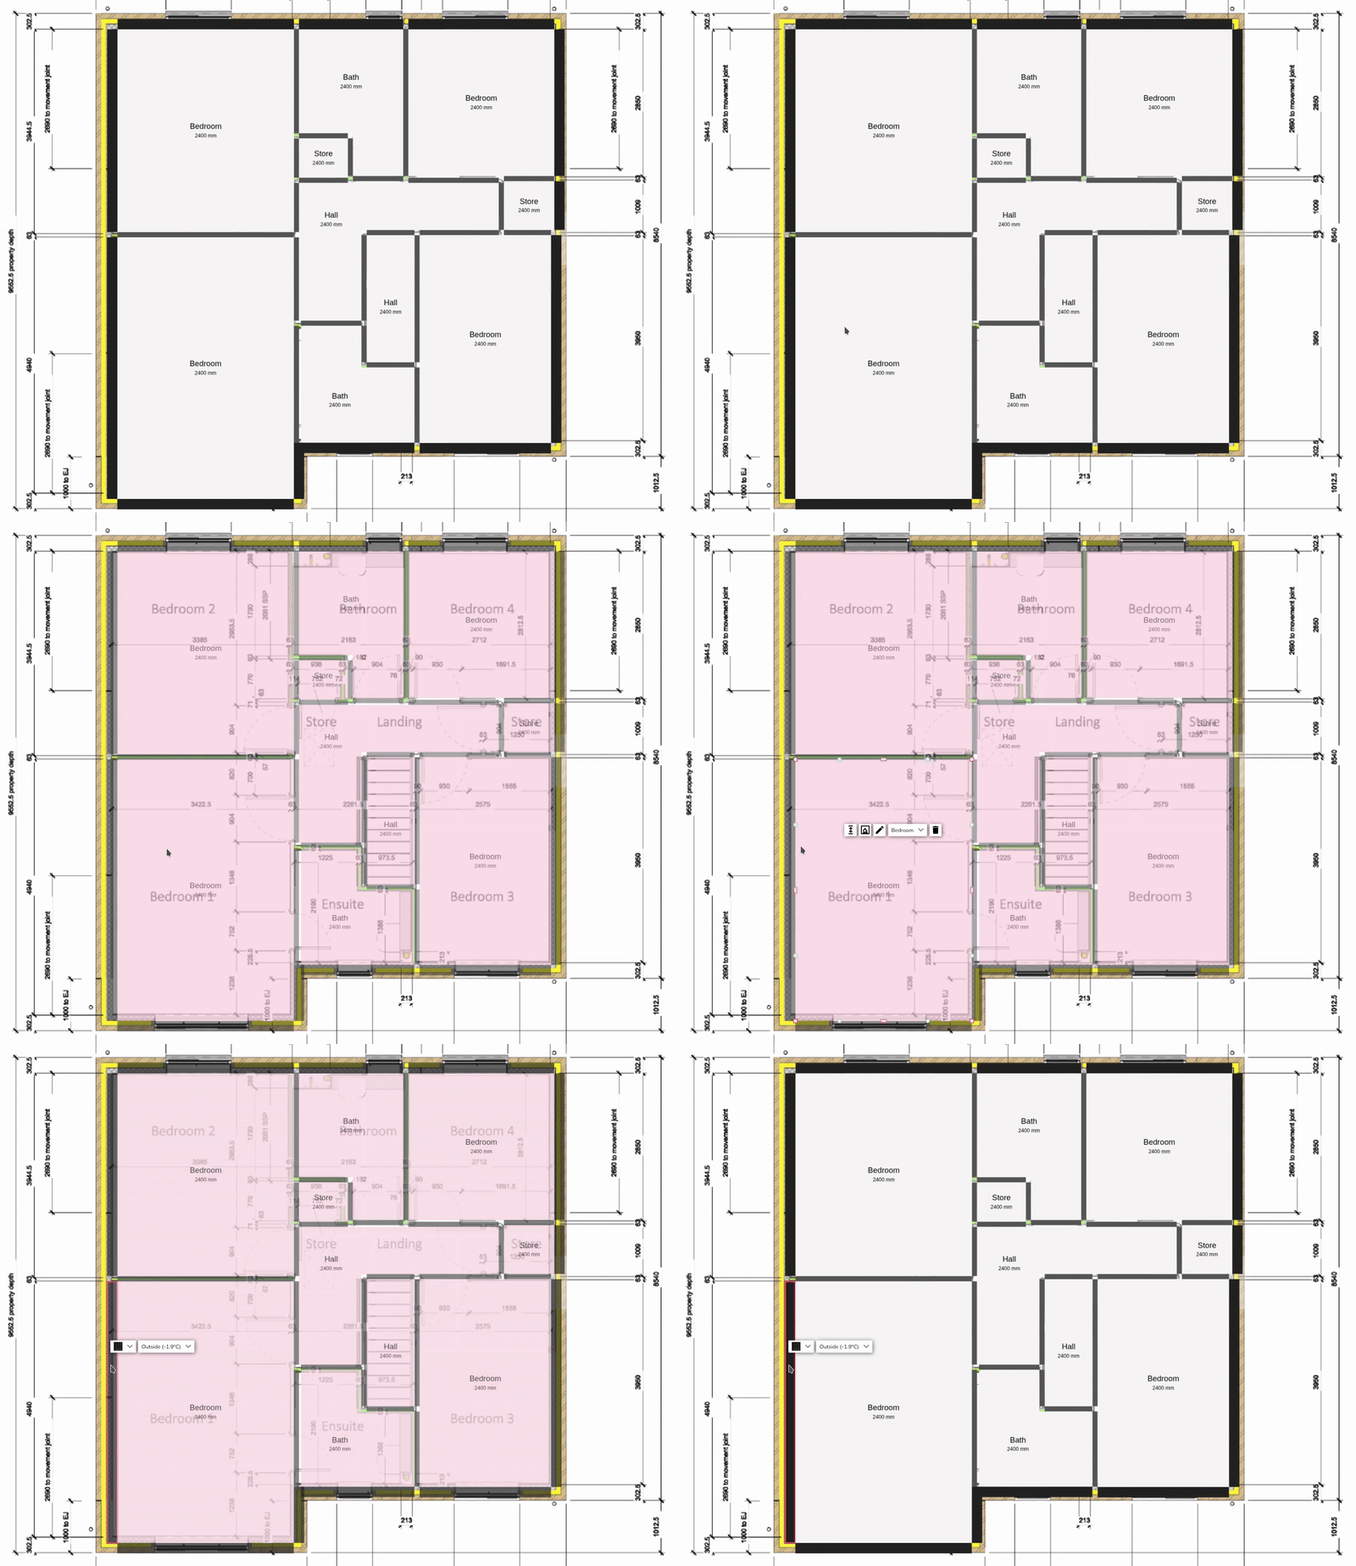
Drag and drop rooms to build up the floor plan as normal, using the PDF plan as a guide. Read more about [creating rooms](https://help.heatpunk.co.uk/books/plans-task/page/creating-rooms "Creating Rooms") and [floor plans](https://help.heatpunk.co.uk/books/plans-task/page/creating-a-floor-plan "Creating a Floor Plan") to help with this step.


- **Click and hold** the middle of a room to make the rooms transparent and **show the floor plan upload below**.
- **Click on the walls** of a room to **turn the transparency off** and view the wall and room properties.

[![simplescreenrecorder-2026-01-19_15.25.29-ezgif.com-video-to-gif-converter.gif](https://help.heatpunk.co.uk/uploads/images/gallery/2026-01/pGD7ONkoNefoNEu7-simplescreenrecorder-2026-01-19-15-25-29-ezgif-com-video-to-gif-converter.gif)](https://help.heatpunk.co.uk/uploads/images/gallery/2026-01/pGD7ONkoNefoNEu7-simplescreenrecorder-2026-01-19-15-25-29-ezgif-com-video-to-gif-converter.gif)
### Step 4: Repeat for additional levels and align plans 

Add level and repeat step 1-3.

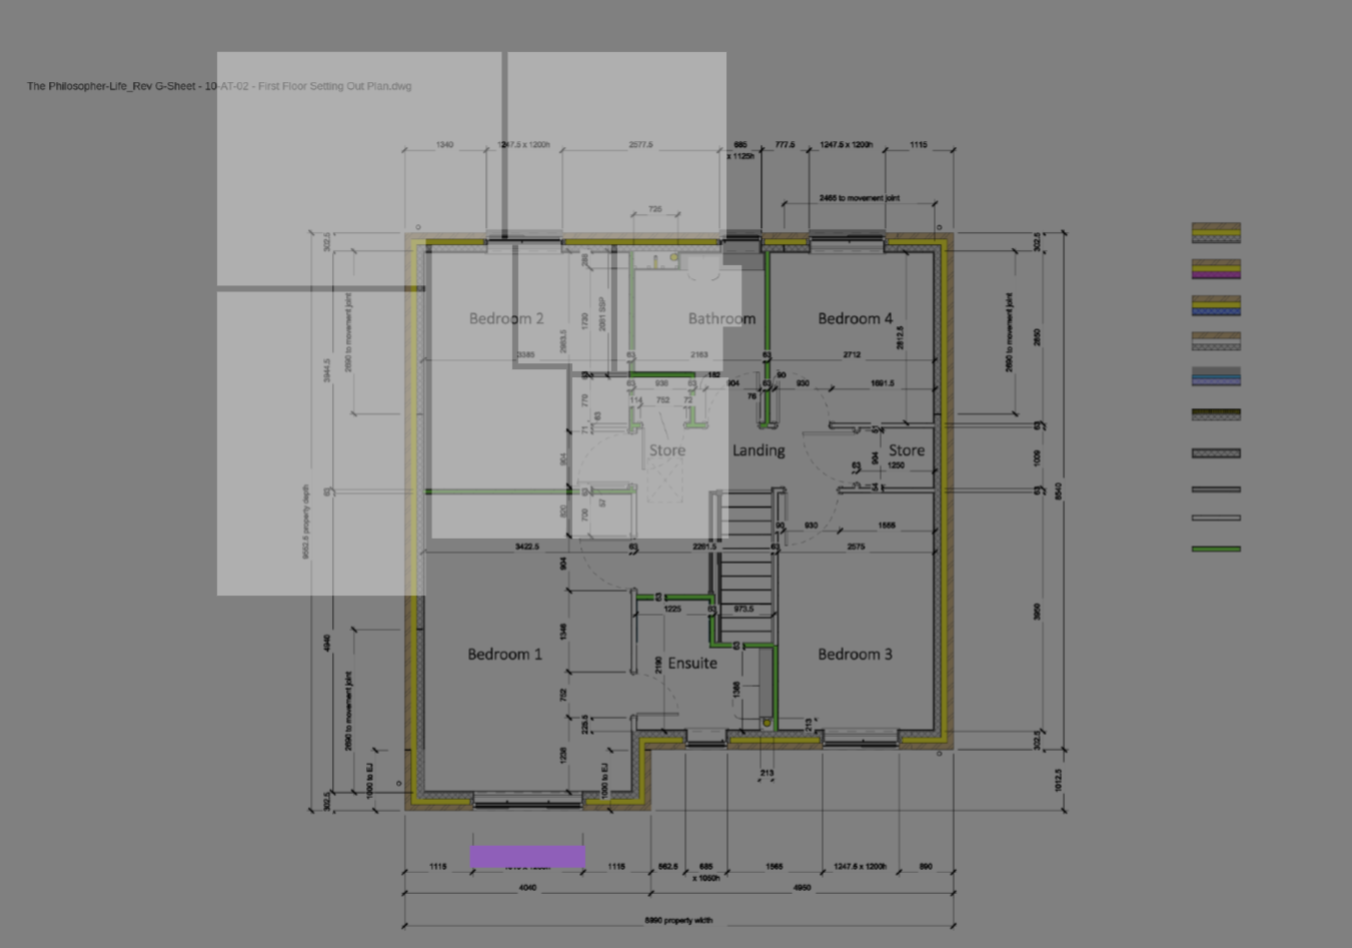
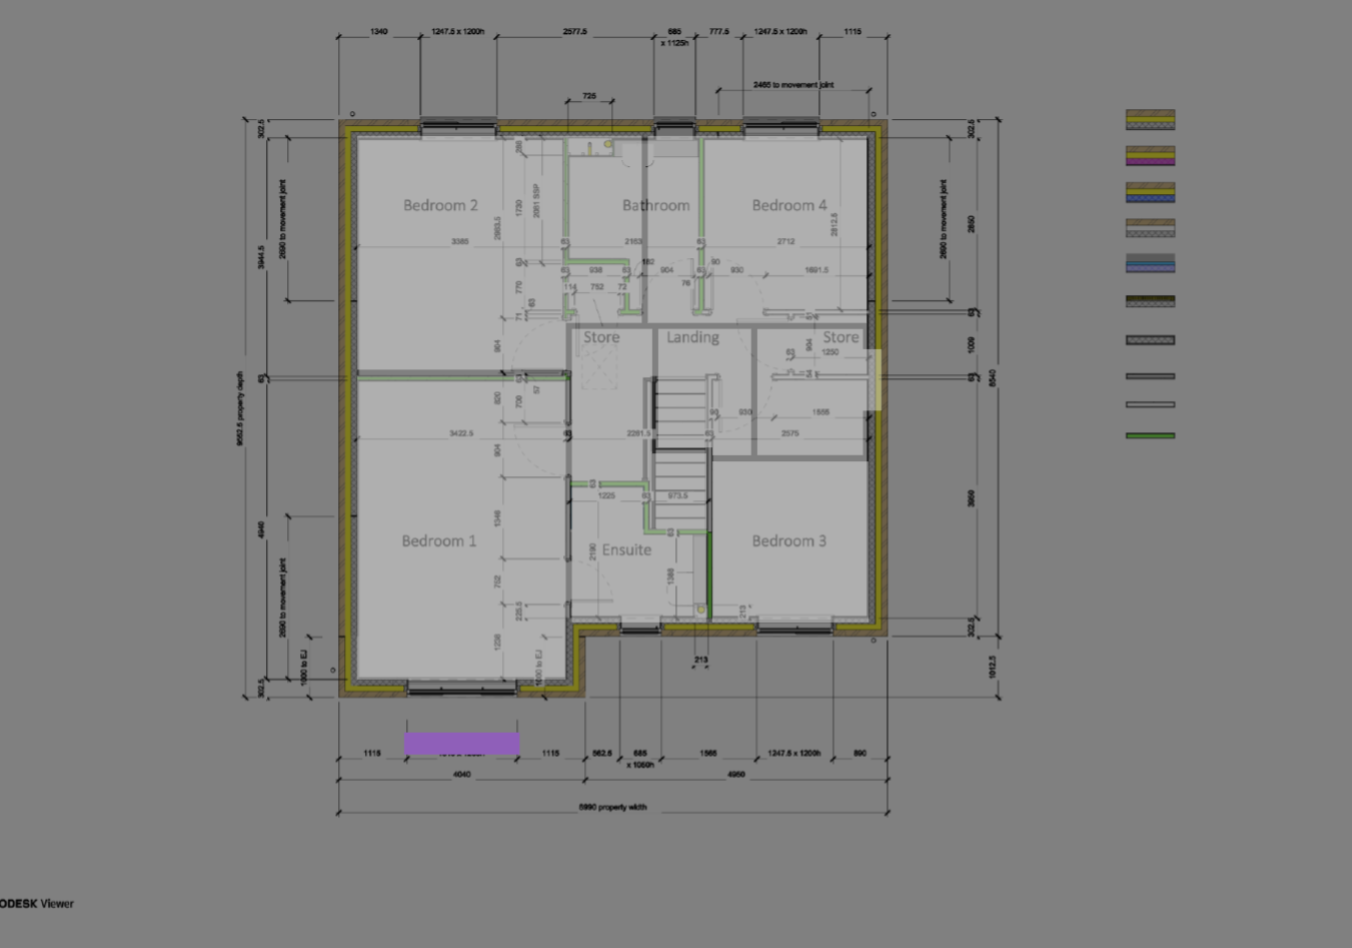
After uploading plans for additional floors, ensure the floor plan is correctly aligned with the floor below. **Double click and drag** to make the plan transparent and display the floor below. You can then align the floors correctly.

<table border="1" id="bkmrk--7" style="border-collapse: collapse; width: 100%; border-width: 1px; background-color: rgb(255, 255, 255); border-color: rgb(255, 255, 255);"><colgroup><col style="width: 50%;"></col><col style="width: 50%;"></col></colgroup><tbody><tr><td style="border-color: rgb(255, 255, 255);">[![image.png](https://help.heatpunk.co.uk/uploads/images/gallery/2026-01/scaled-1680-/YCYfzbr4RD9Pa6PZ-image.png)](https://help.heatpunk.co.uk/uploads/images/gallery/2026-01/YCYfzbr4RD9Pa6PZ-image.png)

</td><td style="border-color: rgb(255, 255, 255);">[![image.png](https://help.heatpunk.co.uk/uploads/images/gallery/2026-01/scaled-1680-/5KbCTiCBd0Cdg5d8-image.png)](https://help.heatpunk.co.uk/uploads/images/gallery/2026-01/5KbCTiCBd0Cdg5d8-image.png)  
</td></tr></tbody></table>

---

## <span class="corp-icon material-symbols-rounded icon-video mceNonEditable" style="user-select: none;">​</span>See how the feature works

Importing floor plans can massively speed up design time. Watch Angus from our software team use the import feature to create a room-by-room heat loss calculation in under 10 minutes.

<iframe allowfullscreen="allowfullscreen" height="362" src="https://www.youtube.com/embed/x9sscNhYN1s" style="width: 819px; height: 457px;" width="646"></iframe>

---

## <span class="corp-icon material-symbols-rounded icon-support mceNonEditable" style="user-select: none;">​</span>Still Need Help? / Want to know more?


- **Related FAQs:** Check out our [Pro and Enterprise FAQs](https://help.heatpunk.co.uk/books/faqs/chapter/pro-and-enterprise) and [Plans task FAQs](https://help.heatpunk.co.uk/books/faqs/chapter/plans-task-creating-a-surveyed-floor-plan) for answers to common questions
- **Further guides**: Take a look at our [Pro help guides](https://help.heatpunk.co.uk/books/getting-started-with-pro) and [Plans task help guides](https://help.heatpunk.co.uk/books/plans-task)
- **Live training:** [Book onto a live demo session](https://cal.com/midsummer-energy/heatpunk-pro) to see this feature in action

**Contact Support:** If you've got further questions, get in touch with our support team at **help@heatpunk.co.uk** (UK) or **help@heatpunk.ie** (IE). *If you are experiencing a bug, to help us look into your issue faster, please include the email address of your account, the name of the project and screenshots of any unexpected behaviour.*