Pro: Create and manage your own components
In this guide, we will detail how to upload custom components on Heatpunk.
For most components you will need to add, there is a set of technical information that needs to be entered so that Heatpunk can conduct necessary performance calculations. This information is available from the manufacturer’s technical datasheet for that specific product.
If you require assistance reading technical information from a datasheet, please contact the manufacturer directly. This is not something we can provide significant support with since these will not be products Midsummer sells.
NOTE: Custom components are located in a separate database to standard Heatpunk. As a Pro customer, you and your team are responsible for uploading and maintaining your own components.
Manage components
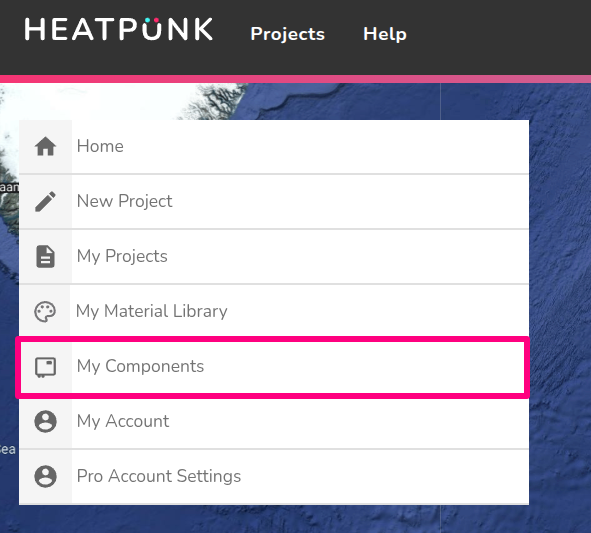
You can access the your components from the Heatpunk home page under 'My Components'.
Below, you'll find full instructions on how to add/manage each type of component.
Heat pumps
Creating manufacturer
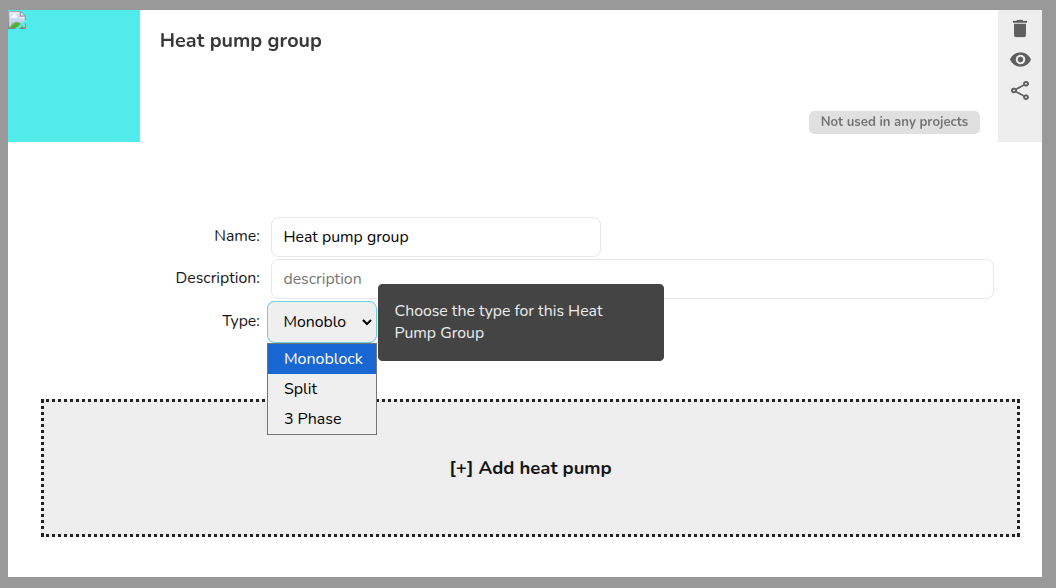
When adding any custom heat pump in Heatpunk you first need to add a custom manufacturer category which allows you to organise your custom components. The components added will be categorised by their manufacturer when it comes to select them in a project.
Inputting information from datasheet
After inputting the name for the manufacturer, re-open your custom manufacturer and you will see additional options to add a heat pump.
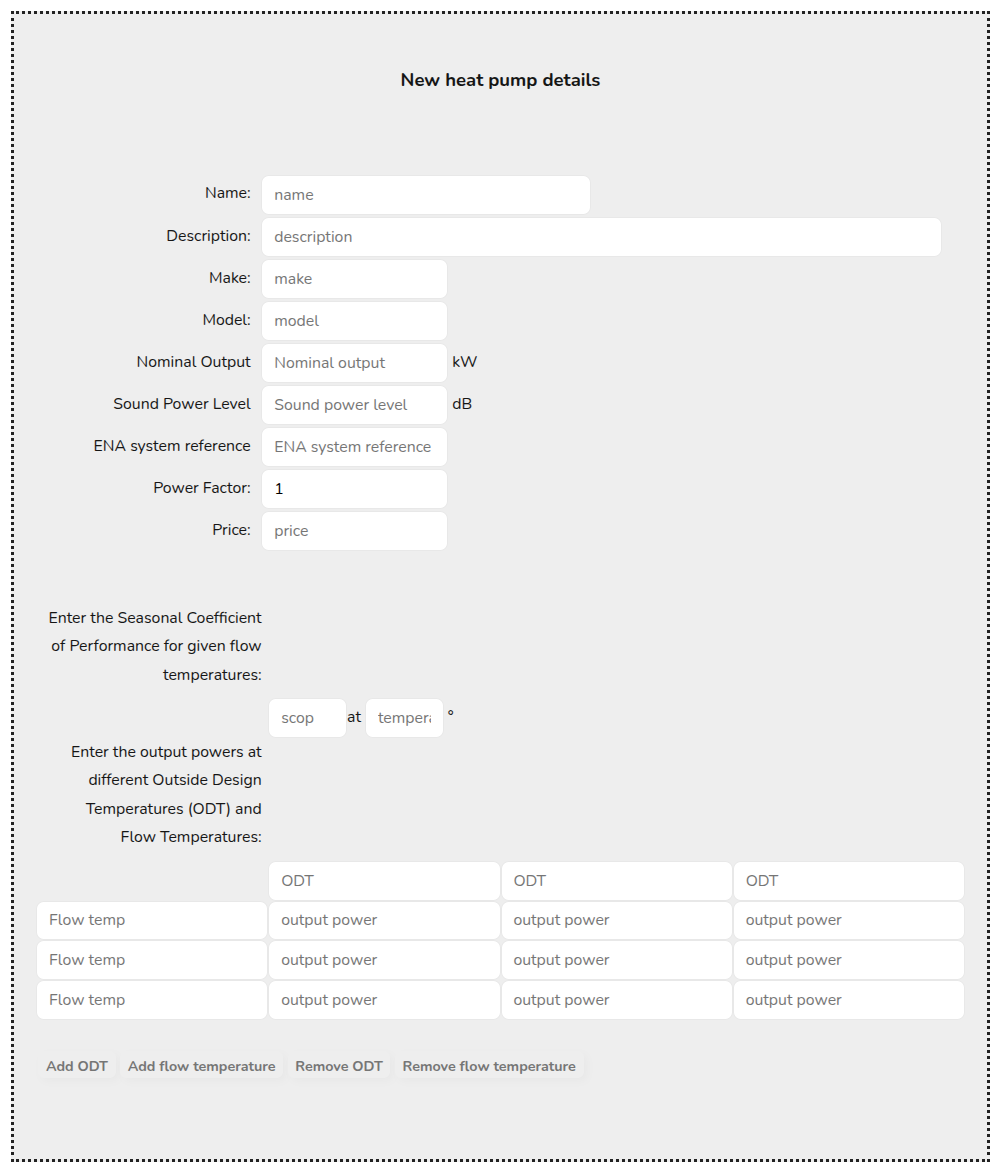
You will then need to input the technical information found in the datasheet for the heat pump.
Below is a list of each value required to add a custom heat pump alongside some details for each.
|
Technical info |
Details |
|---|---|
|
Nominal output |
|
|
Sound power level |
|
|
ENA system reference |
|
|
Power factor |
|
The panel will auto-save once all the required fields are completed. It will not save before this.
You should also add SCOPs and Output Powers. Without this information Heatpunk can not perform the required calculations.
SCOPs:
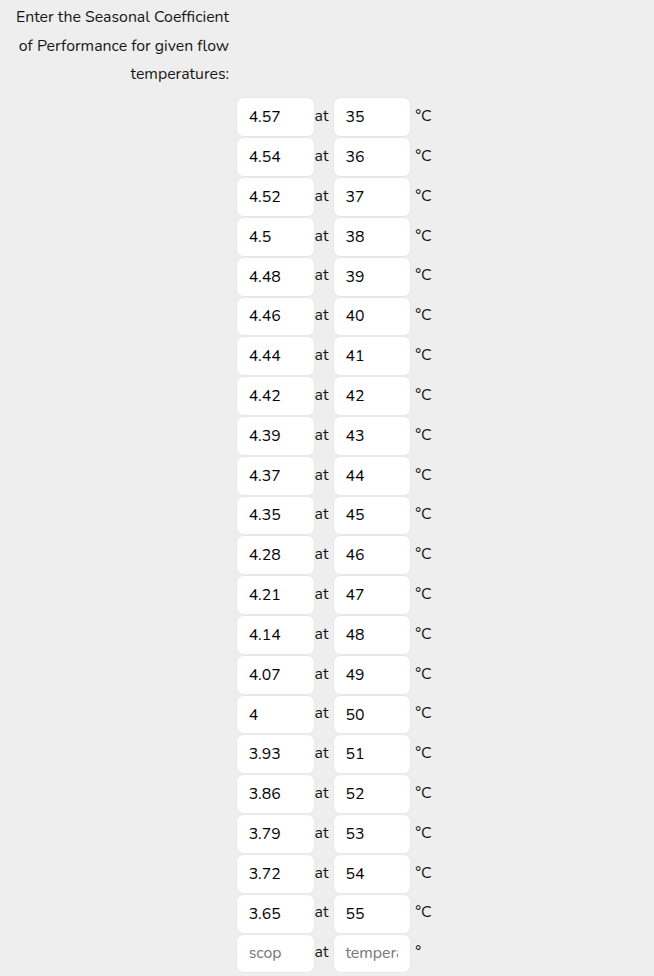
You should input the MCS SCOP at a range of flow temperatures (usually 35-55℃). This information can be found on the MCS Product Directory.
You should add each SCOP at a given temperature individually. Once you have added one, the input box will appear to add the next. A completed example is shown below.
Output Powers:
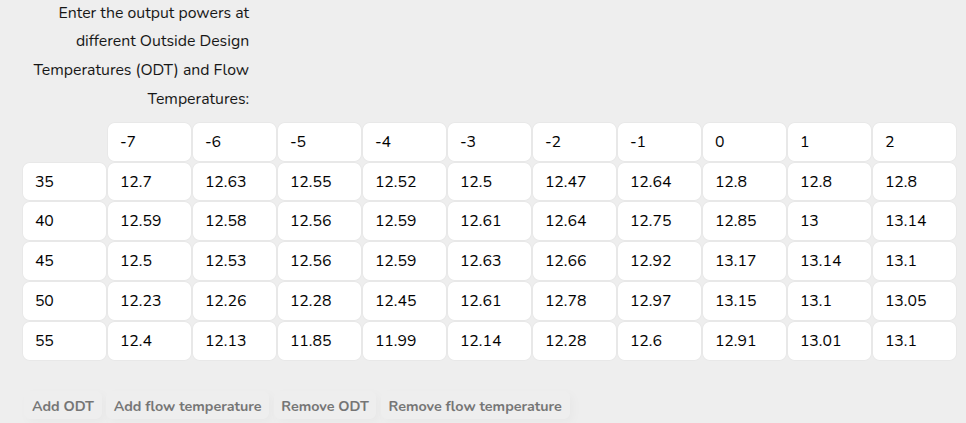
You should add the output power (kW) at a range of outside design temperatures (ODTs) and flow temperatures. You should be able to get this information from the manufacturer.
The more information the better but you should aim for at least -7℃ to 2℃ ODT and 35 to 55℃ flow temperature. A minimum of three data points is needed on each axis of the graph. You can add and remove rows and columns as necessary using the buttons below the table.
Outputs including the defrost cycle are preferred.
A completed example is shown below, however, please note not every manufacturer is able to provide the level of data shown here.
Additional details
You can add a number of additional details as necessary:
- You can name the heat pump you have created and add a short description. Both the name and description will show when choosing the heat pump as well as in your final customer proposal.
- You can add a photo of the heat pump. As with the name and description, this will show when choosing the heat pump as well as in the final customer proposal. To edit the image of the custom manufacturer or component, click on the default image and either upload from your files or paste a copied image.
- You can add a make and model of the heat pump.
- You can add a price for the heat pump. This will be the price that is used in your Heatpunk project.
Once you have added a heat pump successfully - you’ll be able to select it in the list of heat pumps when creating a new project.
Hot water storage
Creating manufacturer
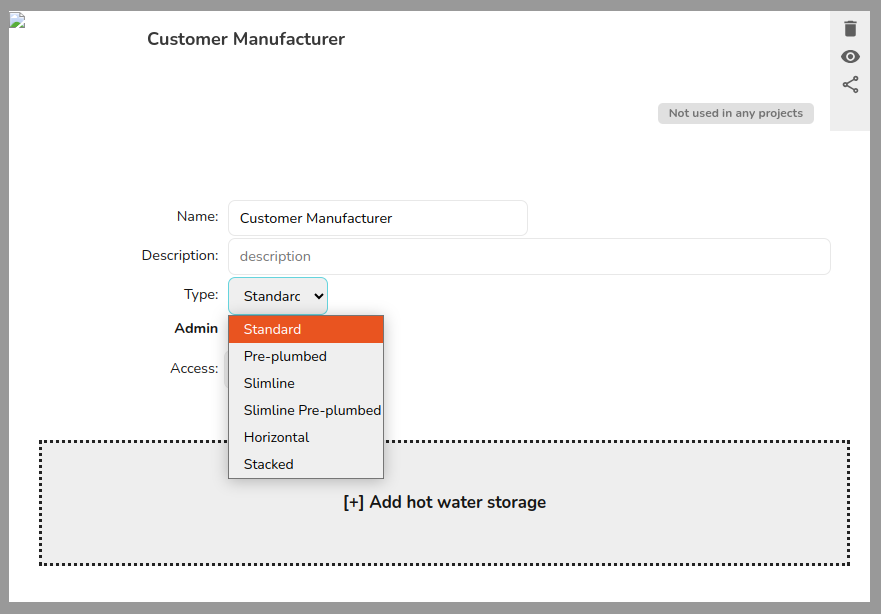
When adding any custom hot water storage unit in Heatpunk you first need to add a custom manufacturer category which allows you to organise your custom components. You should specify the type of storage unit you are adding from the drop-down menu. If you would like to add additional storage units that are of a different type, then you must create a new manufacturer category.
Inputting information from datasheet
After inputting the name for the manufacturer and type of storage unit, re-open your custom manufacturer and you will see additional options to add hot water storage.
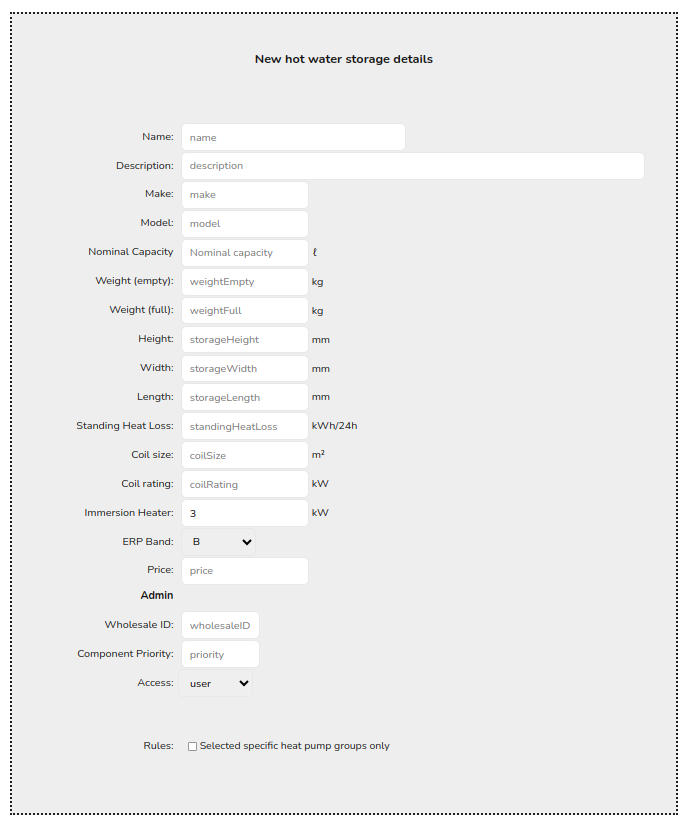
You will then need to input the technical information found in the datasheet for the storage unit.
Below is a list of each value required to add a custom storage unit alongside some details for each.
|
Technical info |
Details |
|---|---|
|
Nominal output |
|
|
Weight (empty) |
|
|
Weight (full) |
|
|
Height |
|
|
Width |
|
|
Length |
|
|
Standing heat loss |
|
You should also add the following technical data, if available:
- Coil size (m2)
- Coil rating (kW)
- Immersion heater rating (kW)
- ERP band - this will autopopulate as B. You should edit as necessary.
Additional details
You can add a number of additional details as necessary:
- You can name the hot water storage unit you have created and add a short description. Both the name and description will show when choosing the storage unit as well as in your final customer proposal.
- You can add a photo of the storage unit. As with the name and description, this will show when choosing the storage unit as well as in the final customer proposal. To edit the image of the custom manufacturer or component, click on the default image and either upload from your files or paste a copied image.
- You can add a make and model of the storage unit.
- You can add a price for the storage unit. This will be the price that is used in your Heatpunk project.
Once you have added a hot water storage unit successfully - you’ll be able to select it in the list of storage units when creating a new project.

