Managing Your Material Palettes and Library
For each Heatpunk project you will need to use a material palette. This palette defines the u-value and thickness of the walls, doors, floors, ceilings that make up the property you're modelling. You can create default palettes usable on any project via your material library or build palettes from scratch for each project.
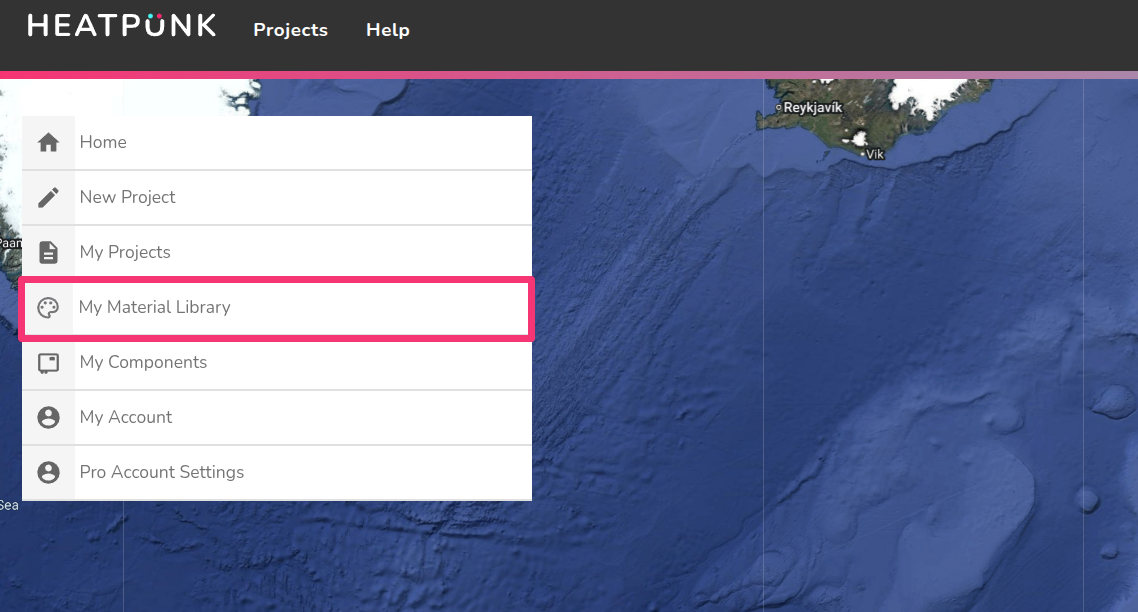
Material Library
The material library can be accessed from the Heatpunk homepage under My Material Library. This library contains all your material palettes.
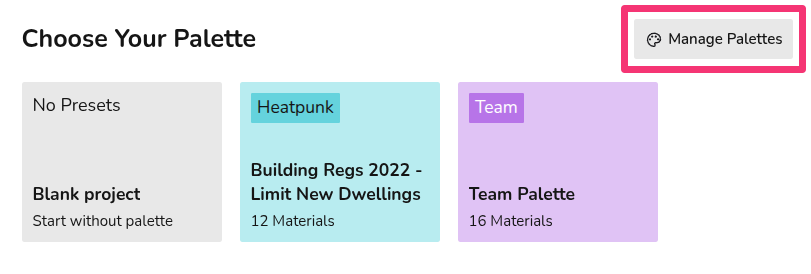
When you create a project, you will see all your complete palettes and the option to create a palette from scratch (No Presets). You can also navigate to the material library from here by clicking Manage palettes.
If you select No Presets and create a palette through a project, it will not save to your material library.
In your material library, you will be able to view and edit all your material palettes and create new ones. Each palette will have a three-dot menu in the top right which will give the following options:
 |
Edit palette Make changes to the palette. This will not affect projects already using this palette. |
 |
Clone palette Make a copy of the palette. |
|
|
Delete palette Remove the palette from your library. This will not affect projects already using this palette. |

See here for information on editing a palette within a project.
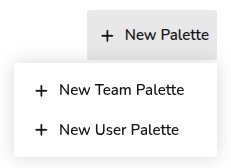
In the top right you can create a new palette.
Creating a palette
- Click + New Palette in the top right, then + New Team/User Palette.
- Input the name of the palette and click OK.
- Click on the new palette to add materials.
- For each section (External walls, Windows, etc.) select the materials you would like to be included in the palette.
- Click the star next to the material you'd like to be the default one used for this palette.
- Once you have added all the materials you need to a section, click Next on the bottom right or navigate to the next section directly from the sidebar.
- Once you have entered a material for each section and completed your palette then click Home on the bottom left to finish.
Default materials (starred) are automatically selected in floor plans, but this can be easily overridden or edited on a per-project basis.
You will then be able to select this palette on any new projects. Note:
- Pre-set materials are based on CIBSE's Domestic Heating Guide, if you can't find the material you need, you can create a custom material.
- Some floor materials will not list the u-value. This is because in the MCS calculation, floor U-values are dependent on the area of the room and the number of edges which are external and are calculated per room.
- Standard users will only be able to make user-level palettes. Pro users will be able to create team-level palettes that will be available when pro team members create a project.
Incomplete palettes
Incomplete palettes will save but will not be selectable on projects.
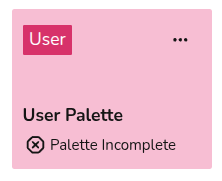
Each section needs at least one material, but only materials used in a project will be displayed on reports. The ! symbol next to each section title signifies that the section is incomplete. Make sure each section has a material, even if you do not plan to use it.

If you have further questions, please get in touch on help@heatpunk.co.uk or help@heatpunk.ie.