
Custom Materials
When creating or editing a material palette in Heatpunk, you have the option to create custom materials. This includes custom walls, floors, roofs, doors, windows and radiators.
Custom materials
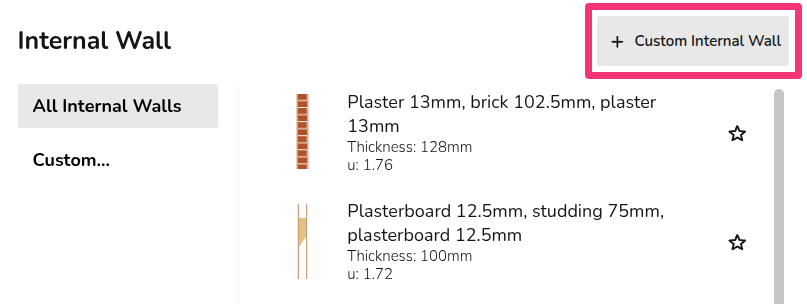
To create a custom material, first start by creating a material palette. Select the relevant section (External walls, Windows, etc.), then in the top right you will see the option to create a custom material.
There are two options when creating your own material (excluding radiators):
- Build layers (only for walls and roofs)
- Enter U-value
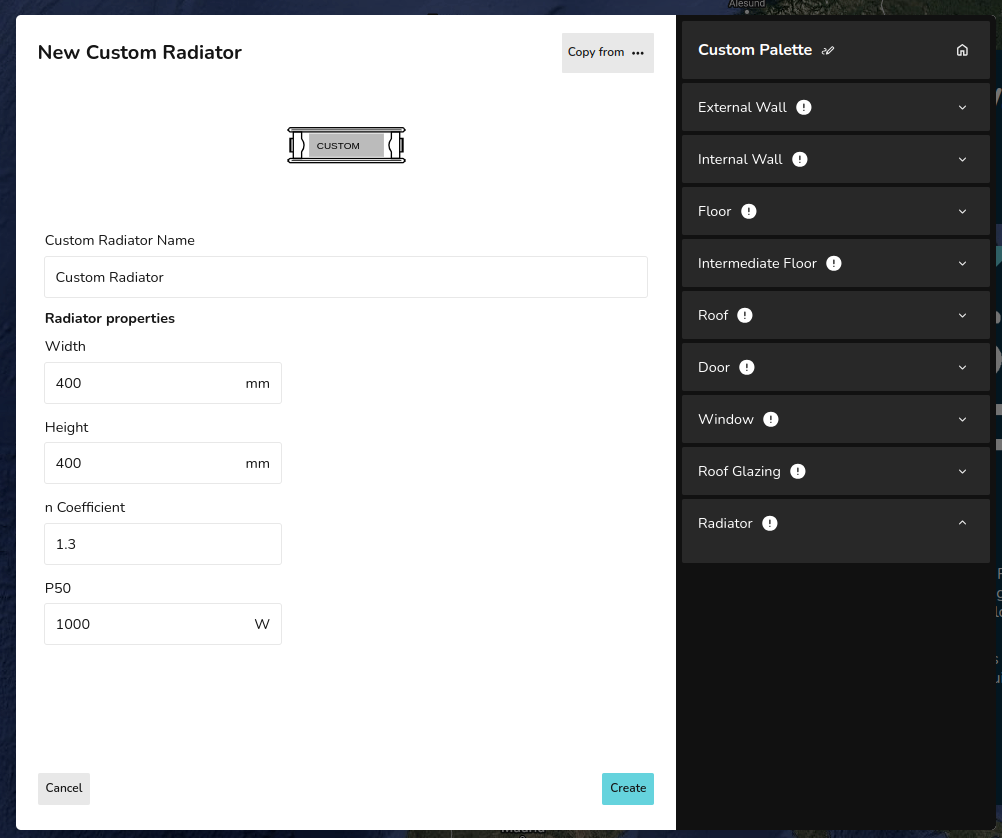
Custom radiators use information from the relevant datasheet.
After creating a material (steps below), make sure to select it on the palette and star it if you'd like it to be the default material used for that section.
Managing custom materials across palettes
You can view all custom materials you've created across palettes from within a material palette, in the final section on the left-hand sidebar called Custom. Click the three-dot menu on the custom material to edit, clone or delete it. Existing projects are not affected by any changes made here.

You can only view the custom materials that are within the scope of the palette. For example, if you're creating a team level palette, you will only be able to view team custom materials. Follow the steps below to view and use all custom materials.
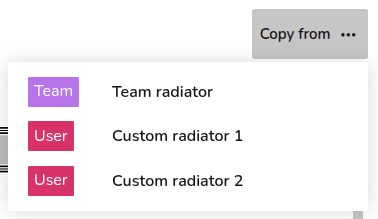
When creating a new custom material, you can also copy the details from existing materials using the Copy from in the top right. Here you will be able to see all custom materials (user and team level) regardless of the scope of the palette being viewed.
Step-by-step
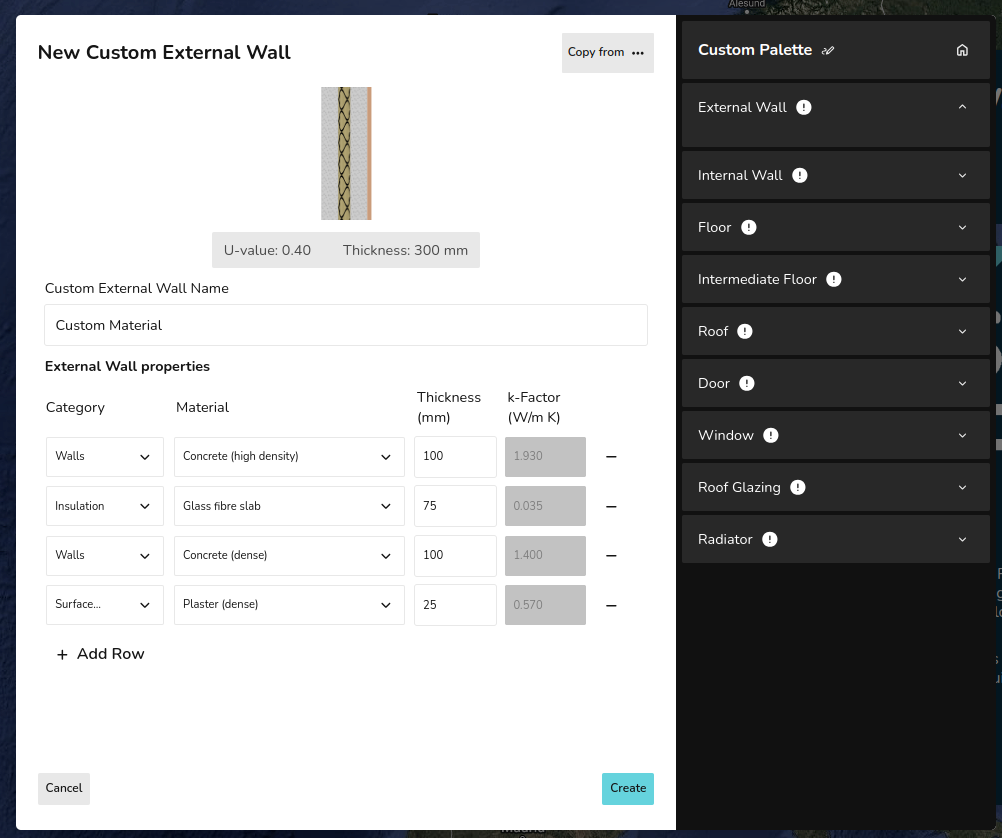
Custom material using Build layers
This option is available for custom walls and roofs:
- Input the name for the custom material.
- Select category of material from the drop-down.
- Select material from the drop-down.
- Input thickness of that layer.
- Add row and repeat from step 2 to 4 until each layer is created.
- Click Create in the bottom right.
For each layer, Heatpunk will then calculate the k-Factor based on the material and thickness. If you select Custom for the material category, you will need to input this k-Factor yourself. The overall thickness and U-value of the material is given at the top.
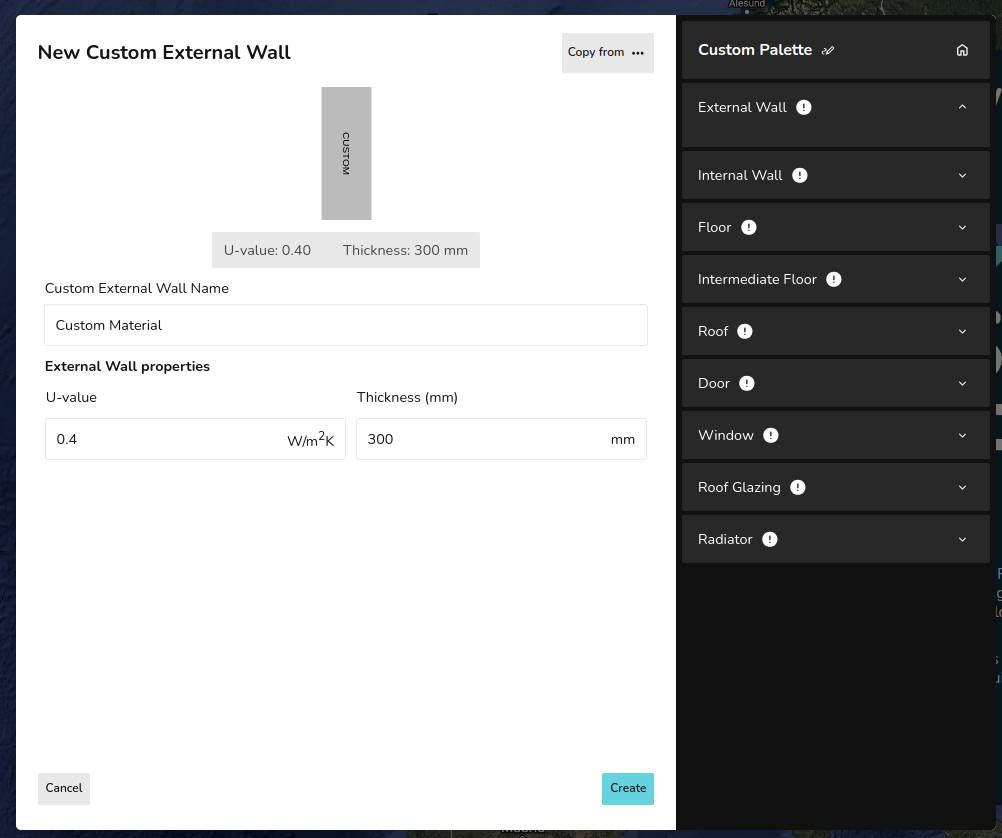
Custom material using Enter U-value
This option is available for all materials (excluding radiators):
- Input the name for the custom material.
- Input the U-value and thickness.
- Click Create in the bottom right.
Custom radiators
The default P+, K1, K2, and K3 radiators in Heatpunk are the Stelrad Classic Compact range. If you are not using these radiators, it's important to create custom radiators so the outputs are accurate.
- Input the name for the custom material.
- Input the width and height of the radiator.
- Input the n-coefficient from the datasheet (typically around 1.3)
- Input the P50 for the corresponding radiator size.
- Click Create in the bottom right.
If you have further questions, please get in touch at help@heatpunk.co.uk or help@heatpunk.ie.