Getting started with Pro
- Getting Started with Heatpunk Pro
- Pro: Create and Manage Your Components
- Pro: Team Management
- Pro: Share Projects and Components
- Pro: Company Details and Subscription Settings
- Pro: Email Credentials
- Pro: Customer Proposal Customisation
- Pro: Automatic Pricing
Getting Started with Heatpunk Pro
Our pro tier unlocks team collaboration and access to features that can save you time and impress your customers with a professional journey through their quote and installation.
What do I get with Pro?
We run weekly training sessions which cover all the features that you get with pro. The cost is £35 / month (plus VAT) per user. Below is a summary of everything included in Heatpunk Pro.
- Upload floor plan
- Custom components
- Project and component sharing
- Project status tracking
- Customised customer proposal
- E-signing
- Document storage
- Emailing
- Survey and installation record
- Additional forms and reports
- Connect Direct API
- CRM connections
- Shrunk Punk (for additional cost)
How do I upgrade?
To upgrade to pro, log into the account you would like to be the Owner. In the top right, you will see the option to Upgrade to pro:
- Add team members and set their role type
- Connect to Midsummer so your pricing correctly applies for all team members
- Fill in billing details
- Pay via GoCardless instant bank payment
Some banks do not support instant payments so if you're having trouble setting up the payment, please get in touch so we can do this manually.
Configuring team settings
Once you've upgraded, you can then configure your team settings. You can read about the options you have below:
-
General
- Setting up sharing permissions
-
-
Upload shared documents that can get attached to emails
-
Upload images used in proposal customisation
-
If you have further questions about pro please attend an online training session, have a look at our pro FAQs or get in touch!
Pro: Create and Manage Your Components
In this guide, we will detail how to create custom components on Heatpunk.
For most components you will need to add, there is a set of technical information that needs to be entered so that Heatpunk can conduct necessary performance calculations. This information is available from the manufacturer’s technical datasheet for that specific product.
If you require assistance reading technical information from a datasheet, please contact the manufacturer directly. This is not something we can provide significant support with since these will not be products Midsummer sells.
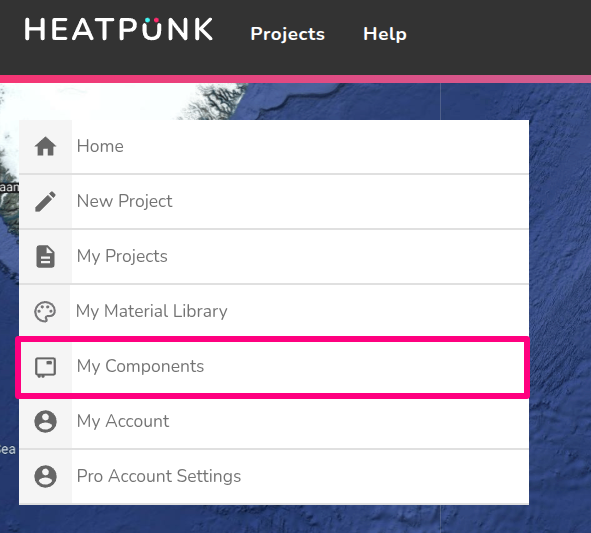
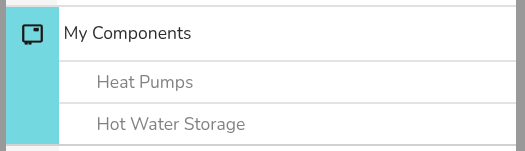
You can access the your components from the Heatpunk home page under 'My Components'.
Heat pump
Creating manufacturer
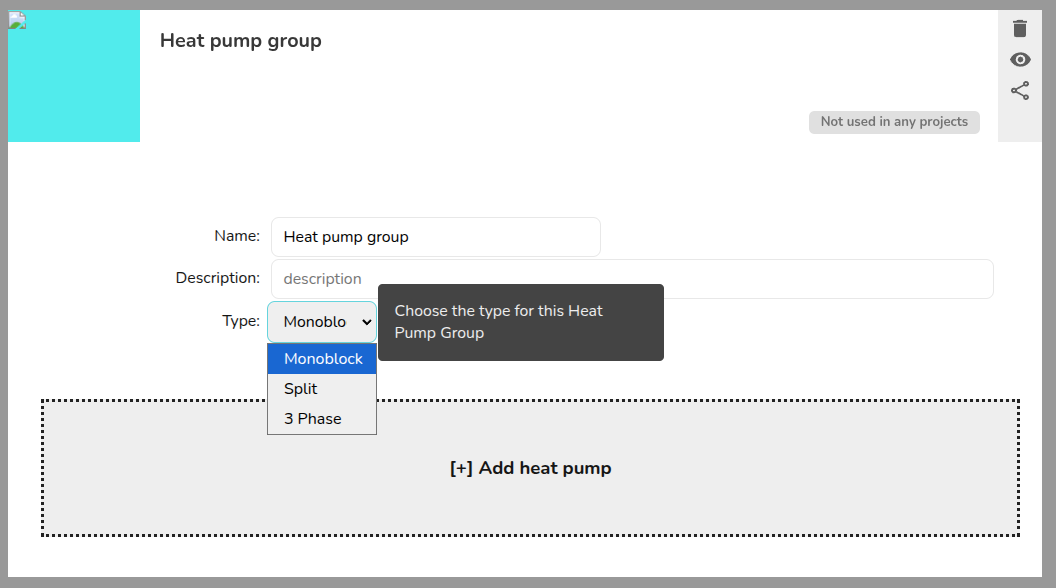
When adding any custom heat pump in Heatpunk you first need to add a custom manufacturer category which allows you to organise your custom components. The components added will be categorised by their manufacturer when it comes to select them in a project.

Inputting information from datasheet
After inputting the name for the manufacturer, re-open your custom manufacturer and you will see additional options to add a heat pump.
You will then need to input the technical information found in the datasheet for the heat pump.
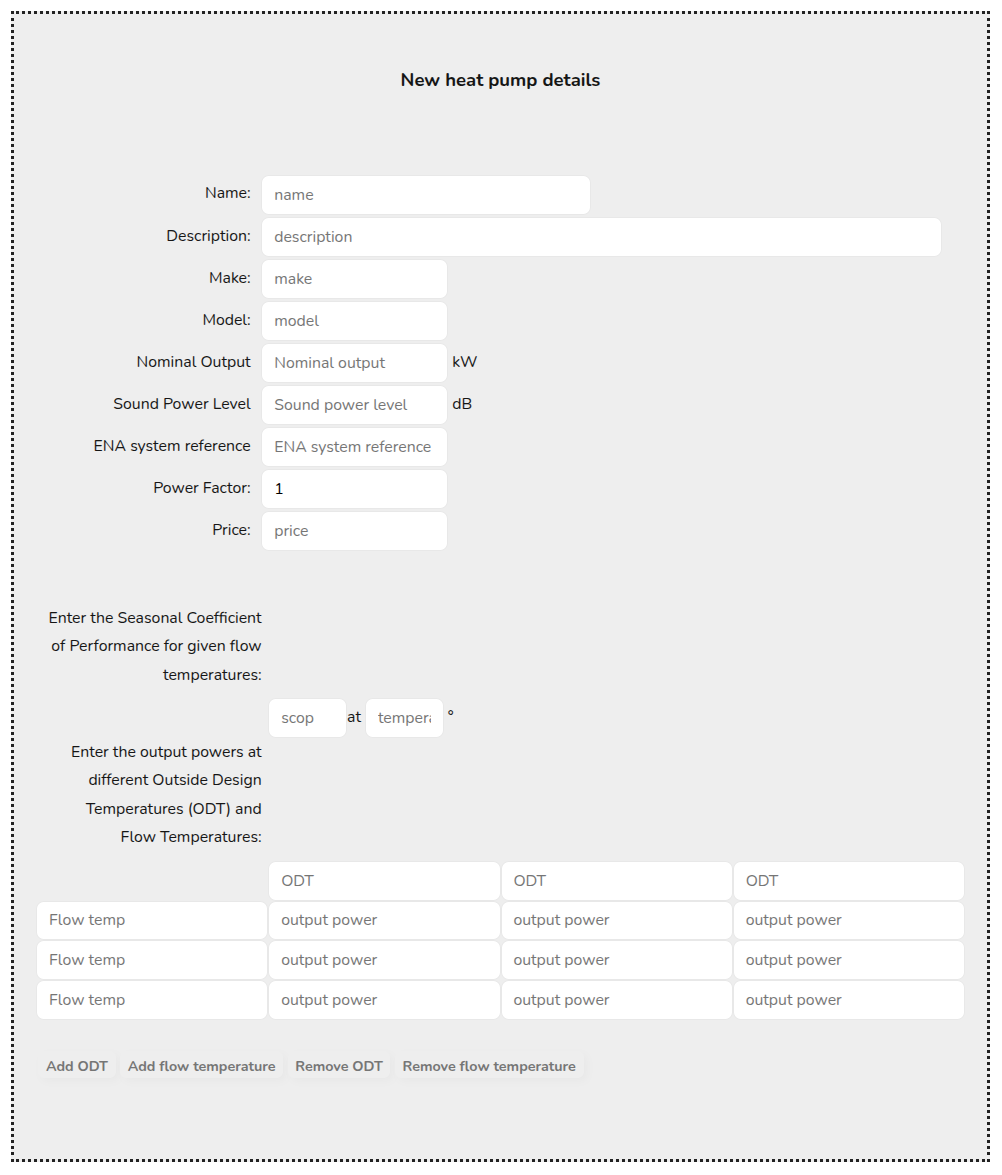
Below is a list of each value required to add a custom heat pump alongside some details for each.
|
Technical info |
Details |
|---|---|
|
Nominal output |
|
|
Sound power level |
|
|
ENA system reference |
|
|
Power factor |
|
The panel will auto-save once all the required fields are completed. It will not save before this.
You should also add SCOPs and Output Powers. Without this information Heatpunk can not perform the required calculations.
SCOPs
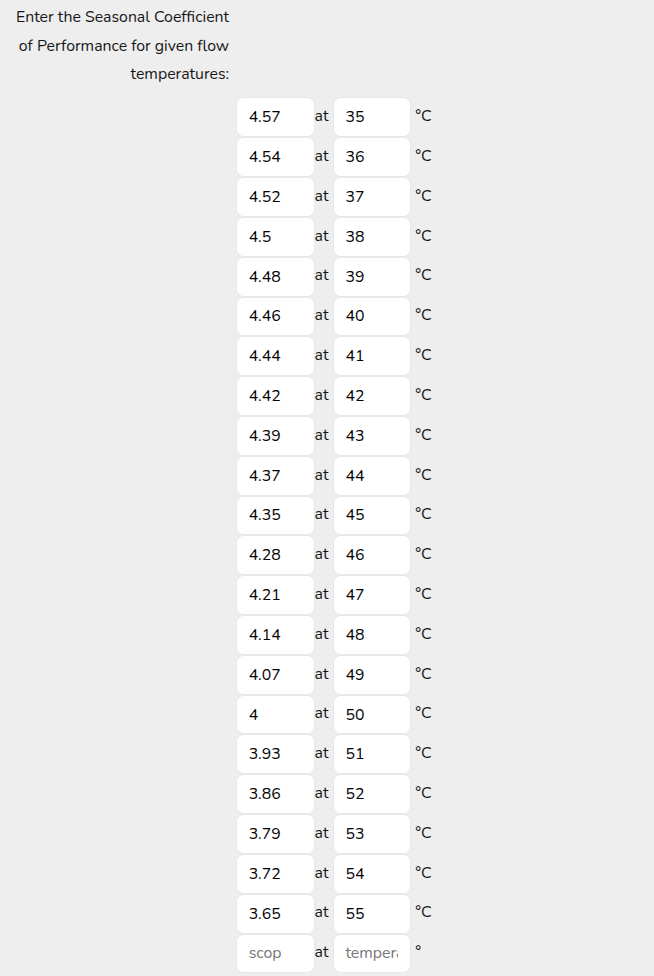
You should input the MCS SCOP at a range of flow temperatures (usually 35-55℃). This information can be found on the MCS Product Directory.
You should add each SCOP at a given temperature individually. Once you have added one, the input box will appear to add the next. A completed example is shown below.
Output Powers
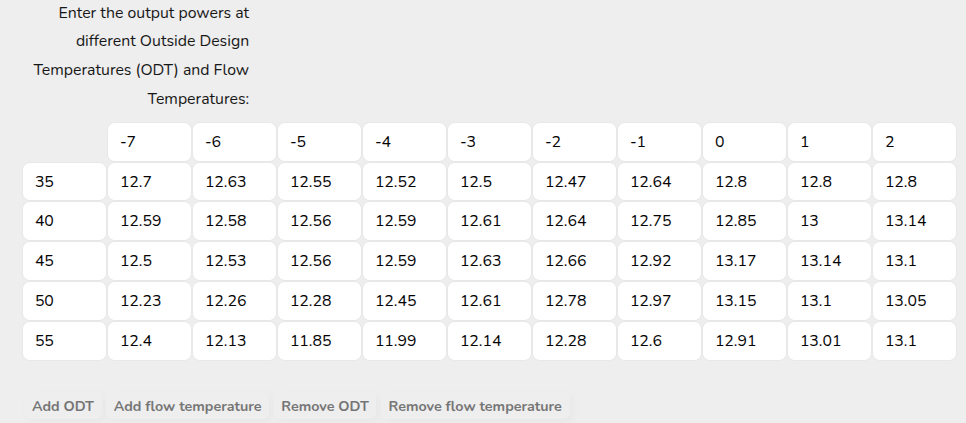
You should add the output power (kW) at a range of outside design temperatures (ODTs) and flow temperatures. You should be able to get this information from the manufacturer.
The more information the better but you should aim for at least -7℃ to 2℃ ODT and 35 to 55℃ flow temperature. A minimum of three data points is needed on each axis of the graph. You can add and remove rows and columns as necessary using the buttons below the table.
Outputs including the defrost cycle are preferred.
A completed example is shown below, however, please note not every manufacturer is able to provide the level of data shown here.
Additional details
You can add a number of additional details as necessary:
- You can name the heat pump you have created and add a short description. Both the name and description will show when choosing the heat pump as well as in your final customer proposal.
- You can add a photo of the heat pump. As with the name and description, this will show when choosing the heat pump as well as in the final customer proposal. To edit the image of the custom manufacturer or component, click on the default image and either upload from your files or paste a copied image.
- You can add a make and model of the heat pump.
- You can add a price for the heat pump. This will be the price that is used in your Heatpunk project.
Once you have added a heat pump successfully - you’ll be able to select it in the list of heat pumps when creating a new project.
Hot water storage
Creating manufacturer
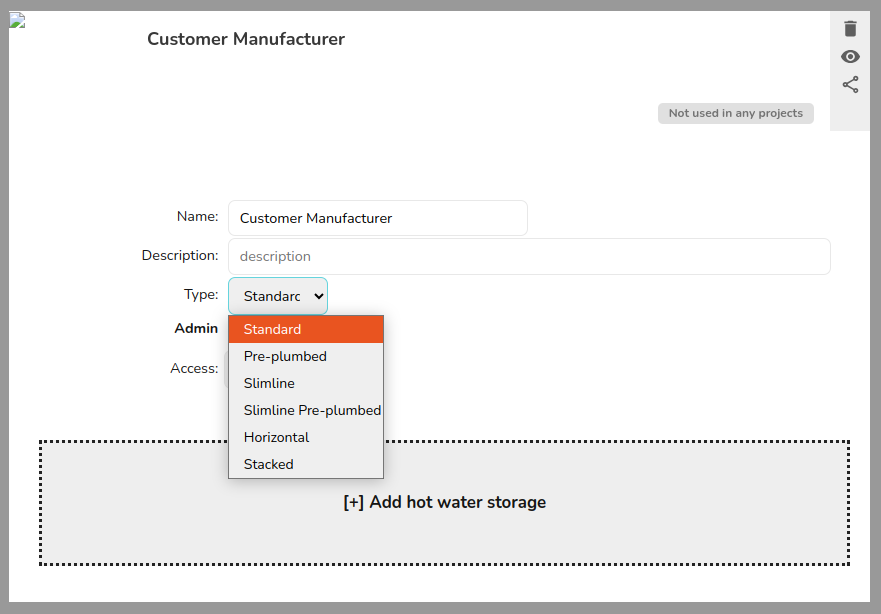
When adding any custom hot water storage unit in Heatpunk you first need to add a custom manufacturer category which allows you to organise your custom components. You should specify the type of storage unit you are adding from the drop-down menu. If you would like to add additional storage units that are of a different type, then you must create a new manufacturer category.

Inputting information from datasheet
After inputting the name for the manufacturer and type of storage unit, re-open your custom manufacturer and you will see additional options to add hot water storage.
You will then need to input the technical information found in the datasheet for the storage unit.
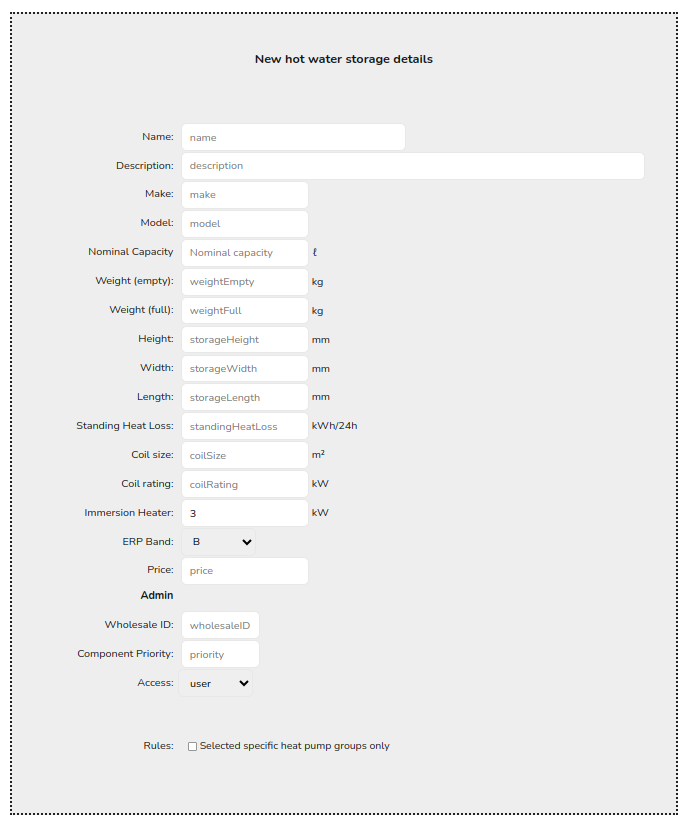
Below is a list of each value required to add a custom storage unit alongside some details for each.
|
Technical info |
Details |
|---|---|
|
Nominal output |
|
|
Weight (empty) |
|
|
Weight (full) |
|
|
Height |
|
|
Width |
|
|
Length |
|
|
Standing heat loss |
|
You should also add the following technical data, if available:
- Coil size (m2)
- Coil rating (kW)
- Immersion heater rating (kW)
- ERP band - this will autopopulate as B. You should edit as necessary.
Additional details
You can add a number of additional details as necessary:
- You can name the hot water storage unit you have created and add a short description. Both the name and description will show when choosing the storage unit as well as in your final customer proposal.
- You can add a photo of the storage unit. As with the name and description, this will show when choosing the storage unit as well as in the final customer proposal. To edit the image of the custom manufacturer or component, click on the default image and either upload from your files or paste a copied image.
- You can add a make and model of the storage unit.
- You can add a price for the storage unit. This will be the price that is used in your Heatpunk project.
Once you have added a hot water storage unit successfully - you’ll be able to select it in the list of storage units when creating a new project.
Pro: Team Management
This guide applies to pro versions of Heatpunk
Team management allows you to have control over who is on your Heatpunk Team and the permissions (role type) they have.
Managing your team
You can manage your team settings in Pro Account Settings > General. The team owner and any users with the admin role type can add and remove users, as well as change their role type.
Role types
With Heatpunk pro, different members of the team can have different levels of access. The roles available are:
- Admin: role includes the ability to view and manage Pro team settings.
- Owner: this is the user who set up the pro team and this role cannot be selected or changed. They have same permissions as admin but cannot be removed from the team, so make sure this is under an email address you can access even if the owner was to leave the company.
- Standard: can access all pro features within projects, but cannot view or edit the pro account settings.
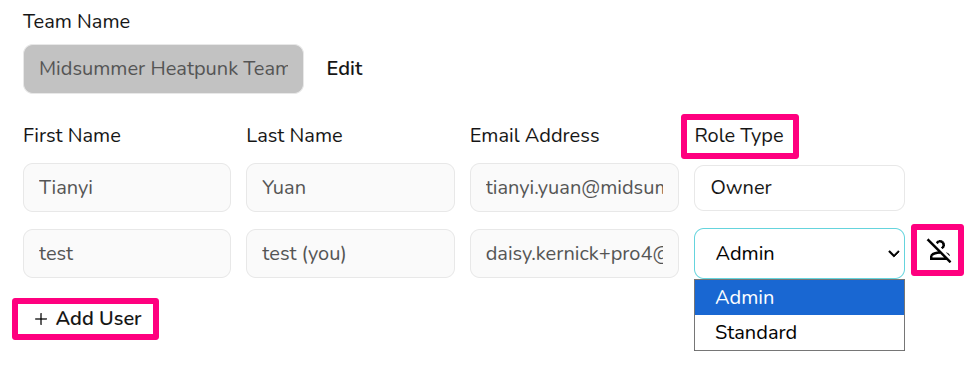
Adding or removing users
To add users, you’ll need the individual’s name and email address (they do not need an existing Heatpunk account). You can then choose the user’s role. This role can be changed at anytime.

The cost for adding a new user will be proportional to how much time is left until your next charge date and subsequent direct debits will be automatically updated.
To remove a user, click on the icon beside their details. This will disable their account and remove them from the subscription. The owner account cannot be removed so ensure it is under a company email address.
Editing users
User names or email addresses cannot be edited here. This can only be done while logged into the relevant account. If you've made a typo when adding a new user to your team, get in touch with the support team.
See here for information on sharing projects and components between team members. If you are having any issues with editing your team members, please get in touch.
Pro: Share Projects and Components
This guide applies to the pro versions of Heatpunk
With Heatpunk pro you're able to collaborate with your team by sharing projects and components. See below how you can configure your sharing settings.
Default sharing
Each user in a Pro team can configure default sharing settings for the projects and components they create. Navigate to My account > Preferences > General and then Default sharing.
In this section, simply select which sharing permissions you would like to be granted automatically when creating a project or component.

This will only apply to new projects. If you would like to share old projects, see below for instructions on manual sharing.
Manual sharing
If you would not like projects or components to share by default, you also have the option to share individual projects or components manually. You will also have the option to transfer ownership to another user when sharing manually.
Sharing a project or component
Project sharing
- From your project list on the My Projects page - click on the share icon on the project you want to share

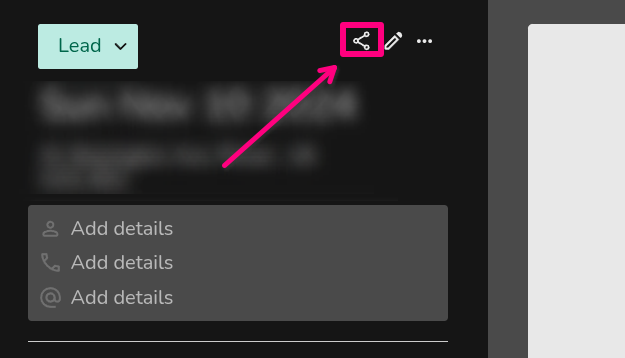
-
From the project overview page of a specific project - click on the share icon in the top left of the project.


Component sharing
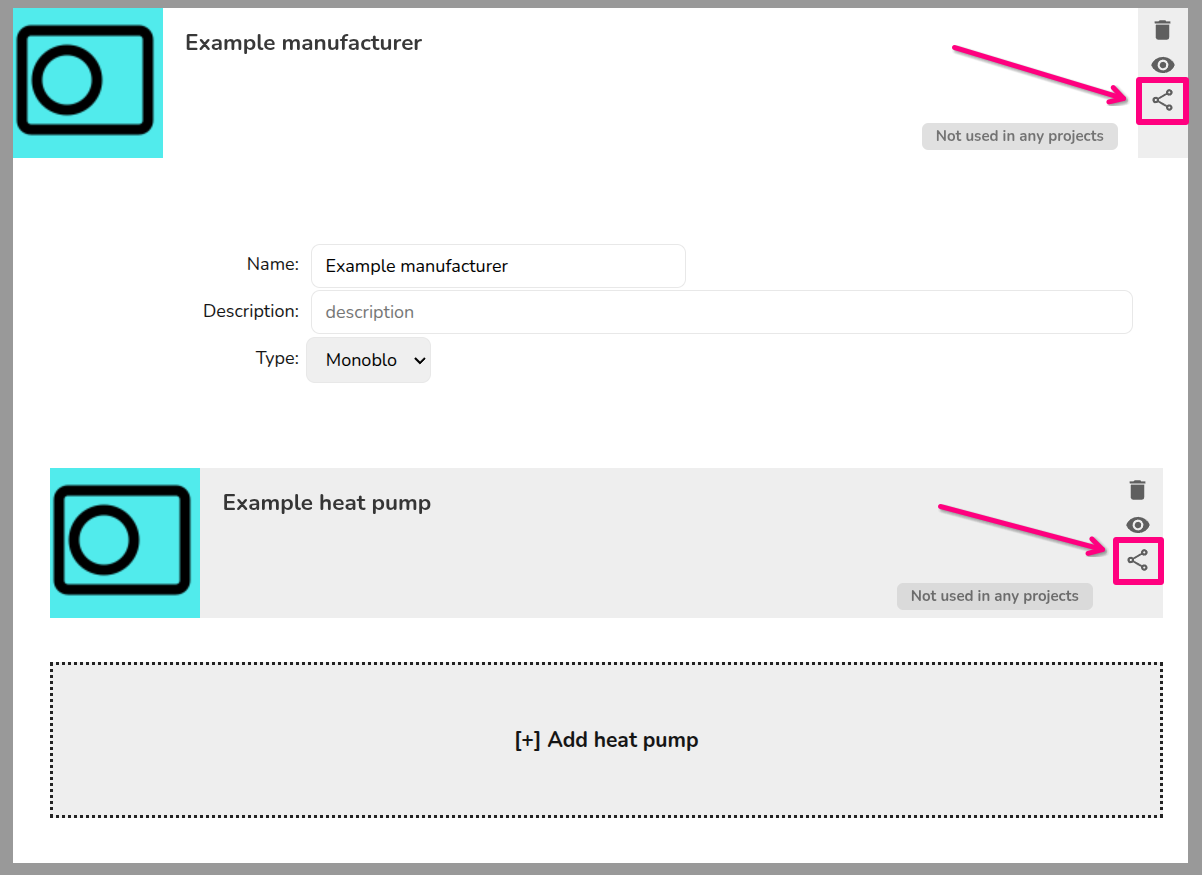
If you are using custom components in Heatpunk, you can share those owned by you with other members of your team. Select My Components from the left sidebar and then select the component type to find the component you want to share. Click on the share icon to configure sharing for the component.
You need to share both the manufacturer group and the individual component.
Selecting which permissions to give
Once you have chosen the project or component you want to share, you can then select the team you want to share with and set the permissions you want to apply. Click save in the bottom right corner. If you have lots of members in your team, you may need to scroll down to see the save option.
If you want to change ownership of the product or component, click on the make owner button beside the name of an individual user in your team. This will assign ownership to that user and you will no longer have permissions to configure sharing.
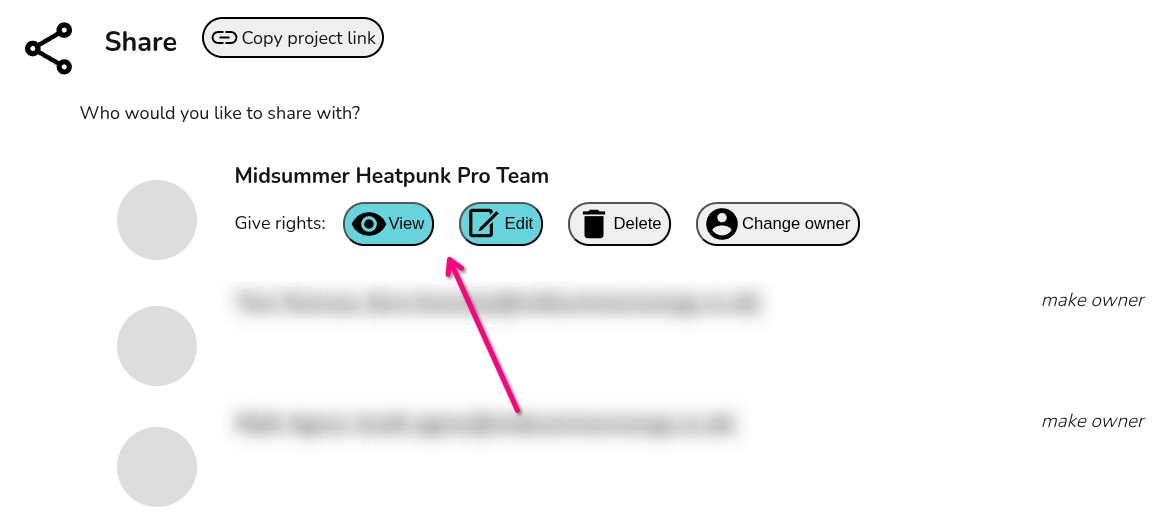
Understanding sharing options
You will have the following options when sharing projects and components in Heatpunk:
- View: users will be able to view projects or use the component, but not edit it.
- Edit: users will be able to make changes to the project or component.
- Delete: users will be able to permanently delete the project or component.
- Change owner: users will be able to transfer ownership of the project or component to another user.
Viewing projects shared with you
To view projects shared with you, make sure this option is selected in the project list page:
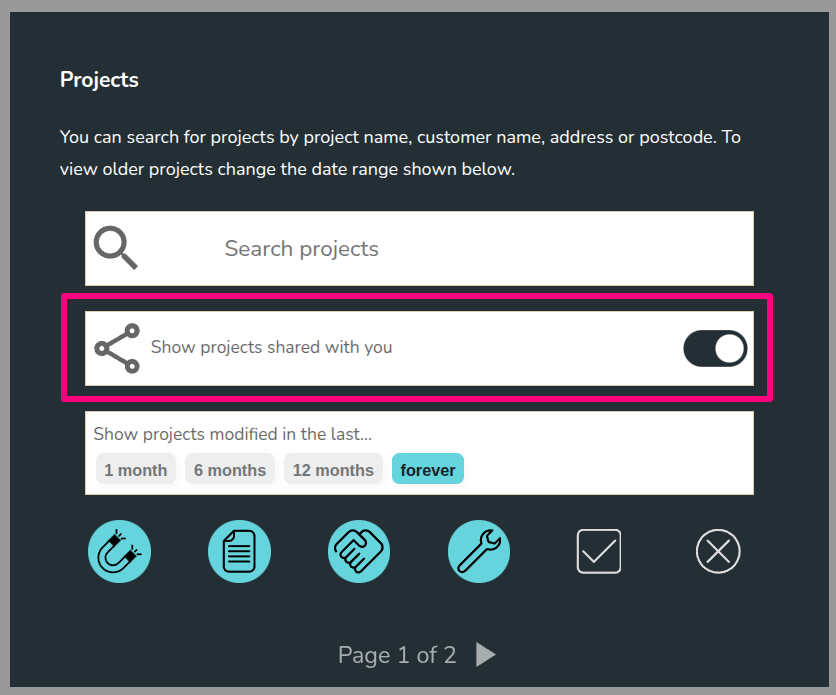
Projects owned by others will say Owned by [name] in the top right corner of the project:

If you're having trouble with any of these permissions or would like to share with individual members of your team rather than the whole team, get in touch with our support team.
Pro: Company Details and Subscription Settings
This guide applies to the pro versions of Heatpunk
You can manage your company details and subscription settings in Pro Account Settings > General.
Company details
You can set default information that will be used across all your team’s user accounts. This includes company name, number, accreditation, logo, address, and postcode.
The details you set here will be used where relevant throughout Heatpunk tasks, forms, and reports.
Billing information
Here you enter the details we should use for billing your subscription. If you have a separate accounts department, you may wish to use their email address here.
We send out invoices by email every month after your subscription payment has been taken.
Subscription status
At the bottom of this section you will see your subscription status with your next billing date listed.
Cancelling your subscription
In the bottom right, you'll see the option to Cancel Subscription. This will cancel your subscription and your team’s accounts will switch back to standard on the date your subscription would have renewed.
Please reach out to our support team if you're having any issues or would like to change your billing details.
Pro: Email Credentials
This guide applies to the pro versions of Heatpunk.
With Heatpunk pro you can send emails to your customer within the software, by setting up your email credentials it means these emails will send from your domain, rather than from no-reply@heatpunk.co.uk.
Email configuration
To edit your email settings navigate to Pro account settings > Email

Here you can enter email credentials to allow emails to be sent from your own email address, how this is set up will depend on what email provider you are using.
OAuth 2.0 - Gmail or Microsoft 365
If Gmail or Microsoft 365 is your email provider, then simply select OAuth 2.0, select the relevant option and click connect, this will direct you to your email where you can approve the connection.
Once it is linked, you can send a test email to make sure it's working as intended.
SMTP
If you have a different email provider then you will need to set up using the SMTP option. What is then required for each field is dependent on provider and you will likely be able to find instructions online by searching for your provider and 'SMTP credentials'. Below is some general guidance for each field
| SMTP Username | These credentials are provided by your email service provider and are used to authenticate your email client |
| SMTP From Address | Optional: This is the email address that recipients see as the sender of the email. In most cases this will be the same as the SMTP username. |
| SMTP Name | Optional: this will appear next to the 'from address'. |
| SMTP Host | This will vary depending on provider. The format will be something like smtp.provider.com. |
| SMTP Password | This will usually be an App Password that you need to set up but in some cases it will be your email password. |
| SMTP Port | Optional: by default this will be 587 but in some cases this will need to be changed. |
Once all required fields are filled in, click save credentials, you can then send a test email to make sure it's working as intended.
If you are having trouble setting this up, please contact support. Please let us know what provider you are using and a screenshot of the email page with your inputs (do not share your password).
Pro: Customer Proposal Customisation
This guide applies to the pro versions of Heatpunk
With Heatpunk Pro, you are able to customise the proposal document that you send to your customers. This can help you align the proposal more with your branding and help you stand out!
What can I customise?
You have the option to:
- Add a custom cover page.
- Customise colours to match your brand.
- Add an 'About us' section to the contents page.
- Configure a branded footer to appear on all pages of the proposal document with your logo and company information.
- Add your terms and conditions and the scope of work sections to the proposal.
- Configure the quote display.
If you want further customisation of the proposal or want us to create a document entirely to your own specification, please contact us about our Enterprise package.
Setting up
Navigate to Pro account settings > Customer Proposal. There will also be a Documents section in your Pro account settings where you can manage all the images you upload.

Colours
Select the colour you would like headers to appear in the proposal document.
You can precisely match this with your branding colours with the RGB, HSL or HEX code, use the arrows to navigate between these options.

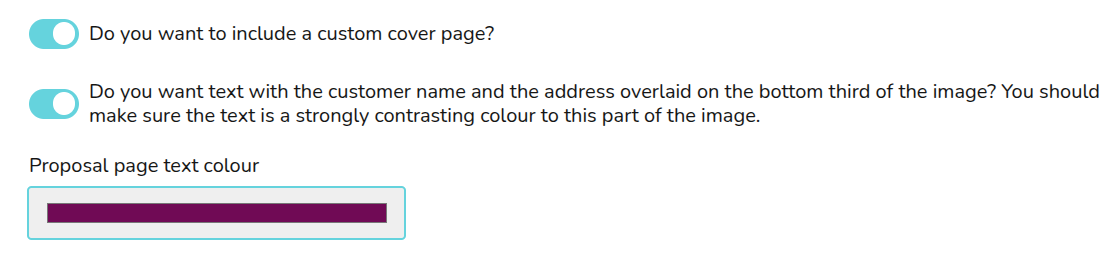
Cover page
Select whether you would like to include a custom cover page and whether you would like the customer name and address overlaid on your cover page and which colour you'd like this text to be.
If you don't already have a preferred way of making a cover page, you might find Canva useful. We have created a template with some additional instructions that you can use to create your own cover page design in Canva. When you are finished, click Share, then download, change the file type to PNG or JPG and download.
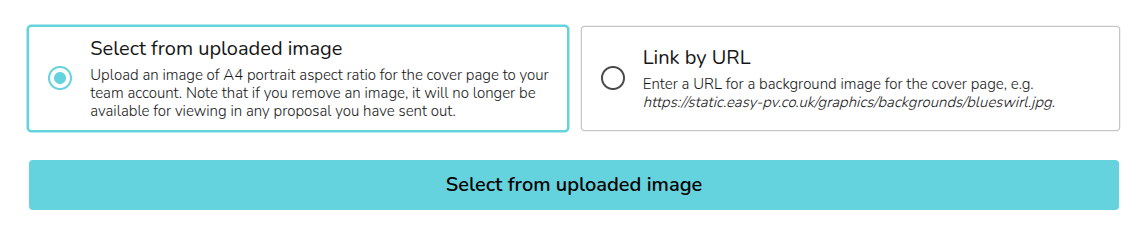
Once you have your custom cover page, either add it in the Documents tab or in the cover page section click Select from uploaded image > Add images. After uploading you will be able to select your cover page. You also have the option to use an image from a URL.
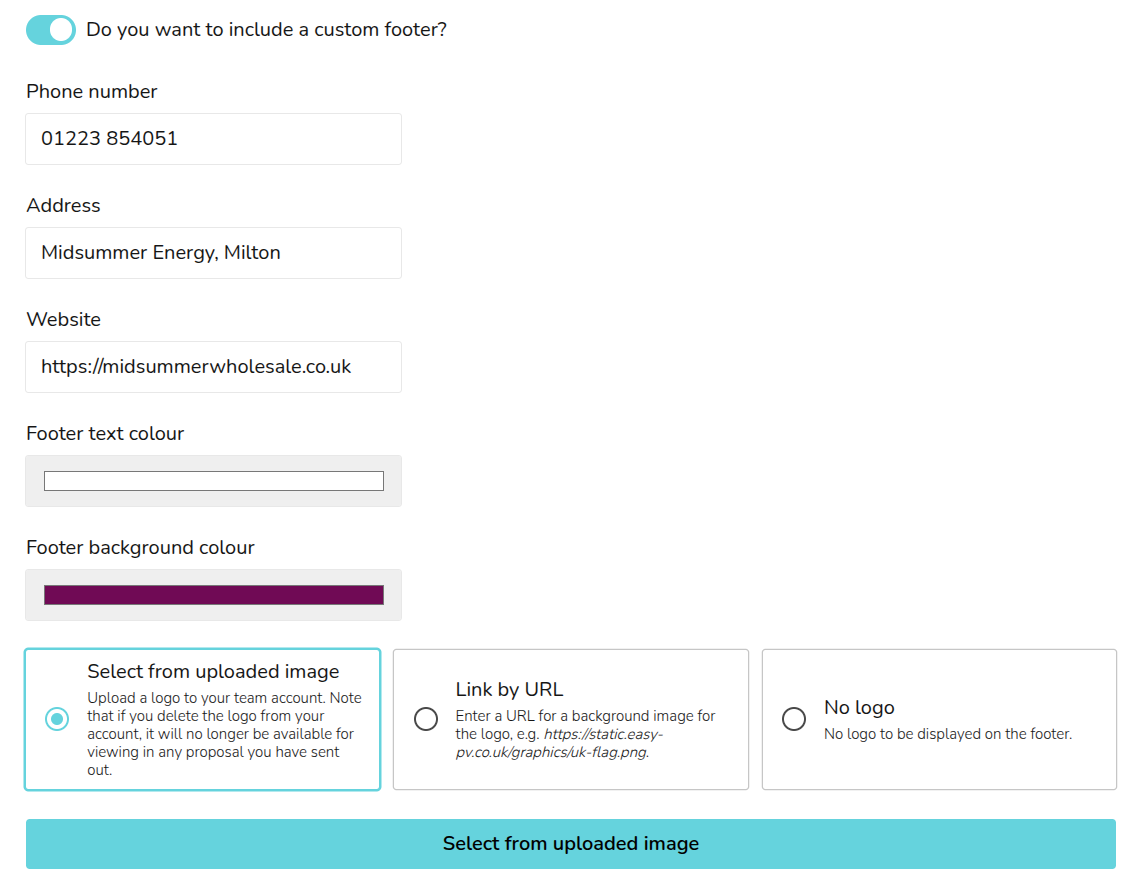
Footer
In your custom footer you can input a phone number, address and website. You can also select the footer background and text colour and upload a logo.
Contents page
In this section you can add a custom cover letter with a custom header and contents. This can be overridden on a per-project basis.

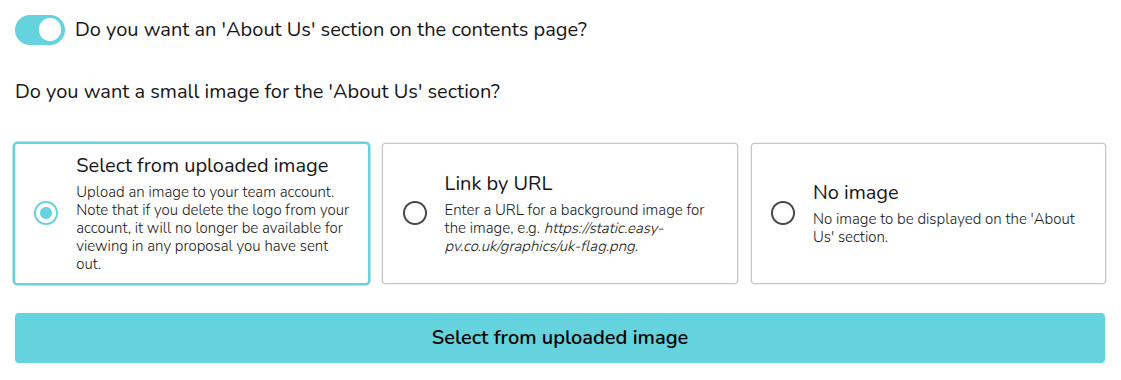
You can also include an 'About us' section with an optional custom image. The 'About us' section should be a short description, make sure it does not overflow onto the next page of the proposal.
Terms and conditions and scope of work
Here you can input your terms and conditions and scope of work. In each case you can use the options at the bottom of the text box to format the text:

Both these options can be overridden on a project by project basis.
Changes made to the contents page, terms and conditions and scope of work will not automatically refresh in projects where you've already opened the customer proposal task. Click the refresh icon next to where it says 'Customer proposal' to reset those fields to what you've got in your settings.
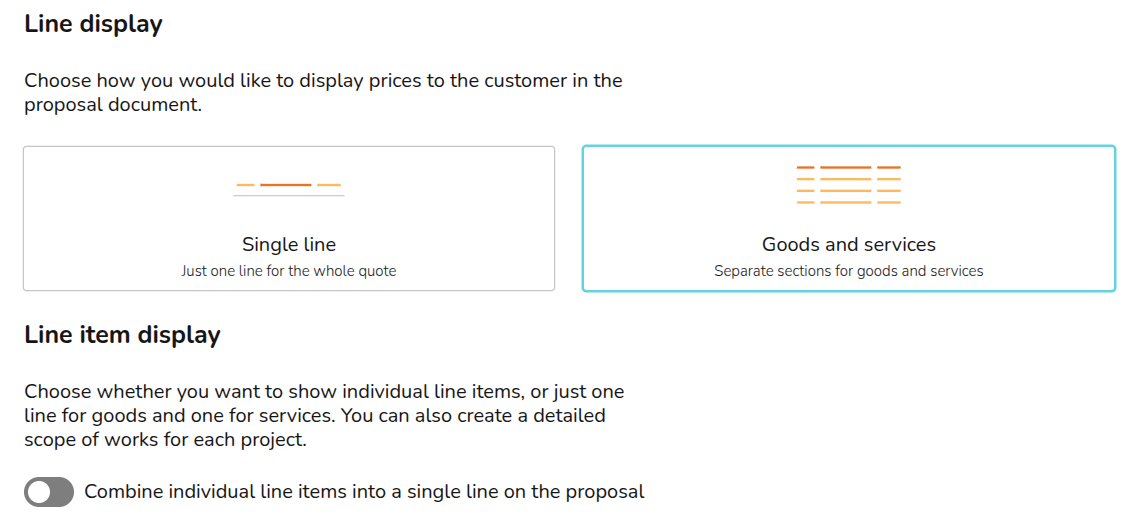
Display of Quote
In this section you can configure the quote format. Select whether you would like the quote to display goods and services separately and whether you'd like these sections to display as individual lines.
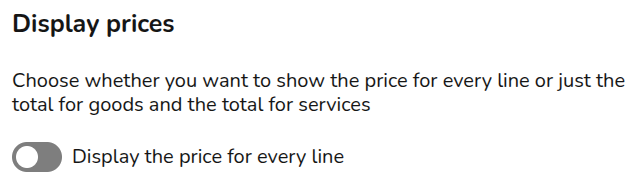
Finally, you can select whether you'd like prices to display for each line item or for it to only show totals or subtotals.
If you have any additional questions about the customisation options or are having issues setting yours up, please reach out to our support team.
Pro: Automatic Pricing
With Heatpunk Pro you can either set pricing based on:
- The cost of materials plus a markup
- Involves cost of material plus a set percentage
- Is best for when you use a variety of components
- Custom lookup tables
- Involves using specified prices for each heat pump and hot water storage
- Is best for when you always use the same components
On top of the cost of materials, you can set up additional charges for delivery of goods, plumbing and electrical labour and travel to the site.
Pricing settings can be accessed via ‘Pro Account settings’ > ‘Automatic pricing’
Configuring pricing for your projects
Choose if you are using markup or lookup tables.

Option 1: Cost of materials plus a markup
When using markup, you enter the percentage markup for goods prices.
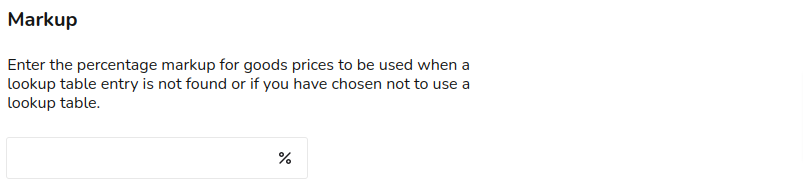
This will apply the specified markup to your Midsummer wholesale price. Ensure your wholesale account is connected, otherwise retail wholesale prices will be applied. See our guide on Connecting to Midsummer for more information on this.
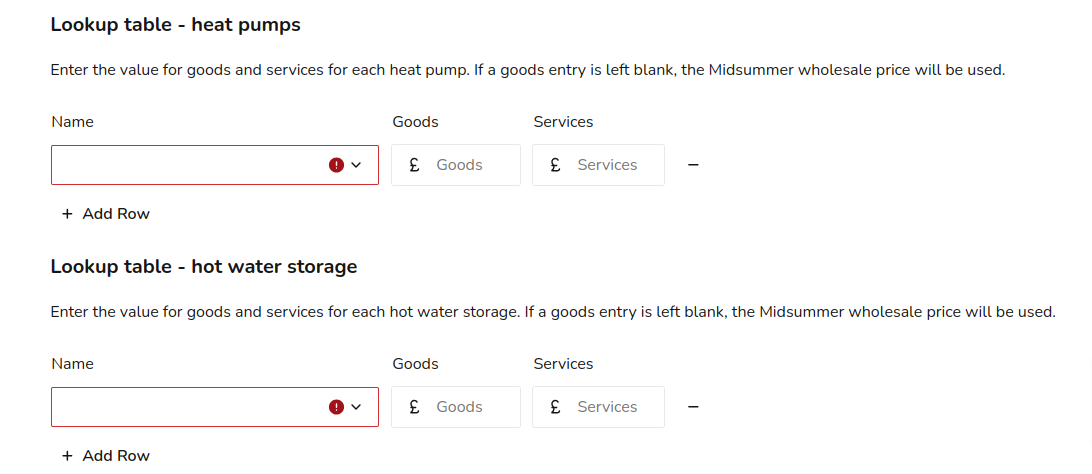
Option 2: Lookup tables
When you have chosen lookup tables, you can first choose to use a markup-based pricing for any designs that don’t match one of the lookup tables you have entered. In this case the marked-up Midsummer wholesale price will be used as a fallback.
You can then create your lookup tables for heat pumps and hot water storage by selecting from the options in the drop down menu and adding the respective prices to goods and services.
Lookup tables are most useful if you install just a few different system combinations. If you use a wide range of kit, it’s probably more efficient to use the ‘markup’ method. Lookup tables also require additional maintenance as the component prices will not change automatically with costs.
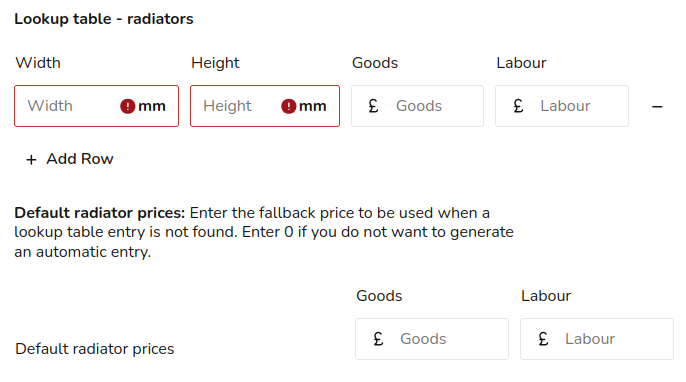
Additional Radiators
Each radiator added via the Heat Pump task will automatically generate an entry in the Financial task. Currently, we do not support varying prices for different radiator types. However, here you can enter the cost of goods and labour for different sized radiators.
You can also set a default radiator price for cases where the radiators used do not match any of your lookup table entries.
Other items
With both options above, after setting up your pricing, you can add prices additional items.
Default items
These items will be added to every project by default. Examples include delivery of goods, plumbing labour and electrical labour.
Optional items
These items will be prompted for addition at the start of the Financial task. Examples include an extended warranty or replacement of microbore pipework.
In each case, you add the description as you want it to appear on the financial task and then a cost of the goods and labour.
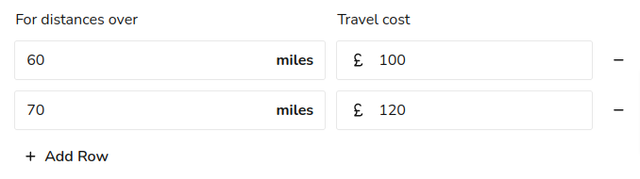
Travel
To set up your office location, navigate to 'My Account' > 'Preferences' > 'General' > 'Company Details' and drag the location pin on the map. The travel distance will be automatically calculated as the driving distance from the office to the project address.
You can then add any additional costs for travel over a certain distance.