
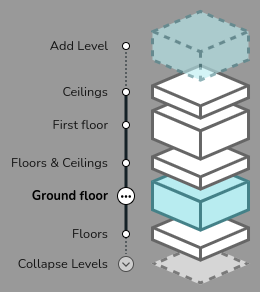
Floors and Ceilings
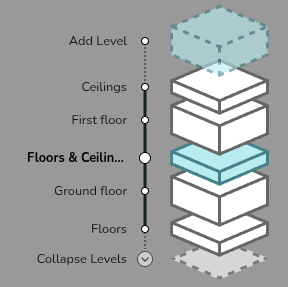
You can add different floors and move between them using the expanded view in the bottom right.
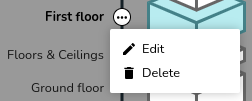
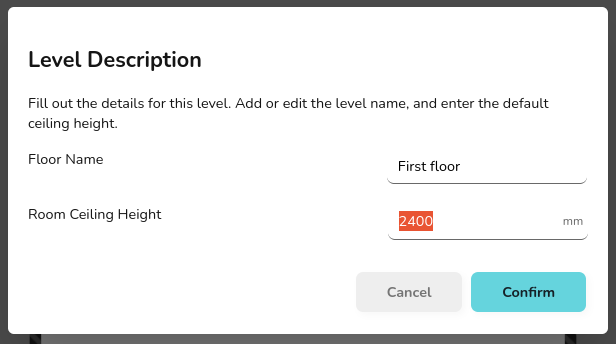
You can change the ceiling height on the whole floor by clicking on the three dots to the right of the relevant floor, and selecting edit. You can also change the name of the floor here. To delete an entire floor, select delete.
Editing the Properties of Floor and Ceilings
Heatpunk will automatically set the material of floors and ceilings to those defaults defined in your palette (see Managing Your Material Library for more information).
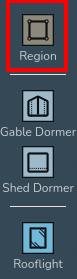
If a different material from your default is used, you will need to add a region.
- First navigate to the relevant floor/ceiling in the bottom right of the screen.

- Drag and drop a region in from the menu on the left. The shape of regions can be edited using the same handles as for rooms (see Creating Rooms).

-
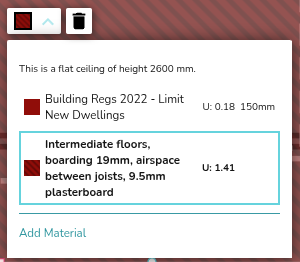
Once you have added a region, select the relevant region and use the drop down menu to change the material as required.
If on the ground floor or the ceiling in the top floor, you should also define what is on the other side of the floor/ceiling (heated, unheated, ground), for intermediate floors, Heatpunk will do this for you.
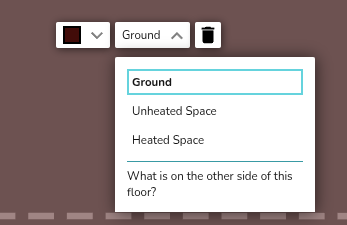
Here, unheated and heated spaces are taken to be 10°C and 18°C respectively. The ground temperature is based on your postcode.


Create as many regions as are necessary to correctly define each area of the floor/ceiling. Regions can be set to cover the entirety of the floor/ceiling, or only certain areas.
Note: make sure you only have one region covering any given area on your floor plan or this will lead to errors in your heat loss calculations.