
Introduction to the Plans task
In the Plans task, you create your initial floor plan - the surveyed plan - and then create design options by placing heat pumps, cylinders, and modelling emitter upgrades directly on the plan.
With heat loss calculations fully integrated into the Plans task, you can clearly see where emitter upgrades are needed. The ventilation calculation and, for UK users, the sound check are also completed in this task.
Creating your surveyed plan
When creating a floor plan, the first step is to select or create your material palette. This palette determines the materials (radiators, walls, windows, floors, etc.) you can use to model the property. This can be edited at any stage.
You will be then prompted to complete the ventilation calculation.
Ventilation calculation
For Heatpunk UK/IE, choose from:
- Legacy MCS method / S.R.50-2021
- Standard method / BS EN 12831-1:2017 using assumed air permeability
- BS EN 12831-1:2017 using measured air permeability
Once completed, you can edit the ventilation calculation by clicking click the ⋯ three dots in the top right corner and then selecting Ventilation details.
Creating floor plan
You will then be prompted to input the default ceiling height and complete the surveyed plan.
To build your plan, drag and drop elements (rooms, radiators, windows, doors) from the left-hand sidebar. As you build the plan and add emitters, you can view the heat loss, total floor area and W/m2 at the bottom of the right-hand sidebar. For details on the heat loss for individual rooms, click 🡥 See room details on the right-hand sidebar of each room.
Read more about creating a floor plan and how to speed up creating your floor plan by uploading architectural plans with Heatpunk Pro.
All emitters added to the surveyed plan will be listed as Existing in the Emitters tab. Read more about emitters for details on emitter upgrades and UFH.
Once you have completed your initial plan, click Finish surveyed plan at the top.
Completing design option plan
Design options are built on top of the surveyed plan. Here you can model the heat pump, cylinders and emitter upgrades directly onto the plan.
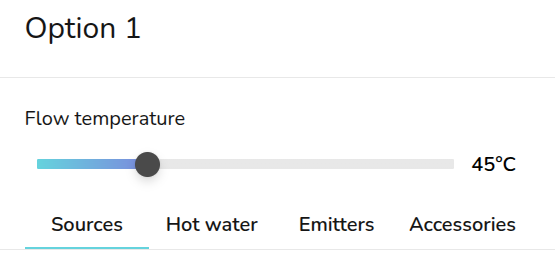
On the right hand sidebar, you can adjust the flow temperature using the slider. From the Sources and Emitters tab, you can view how this affects the heat pump and emitter outputs.
Changes made to the room temperature, ACH and emitters are specific to each design option. Changes will not apply across plans. Navigate back to the surveyed plan to make any changes to your existing emitters. Any other fabric or layout changes can be made from any design option but will apply to all of them. Read more about how design options work.
Sources
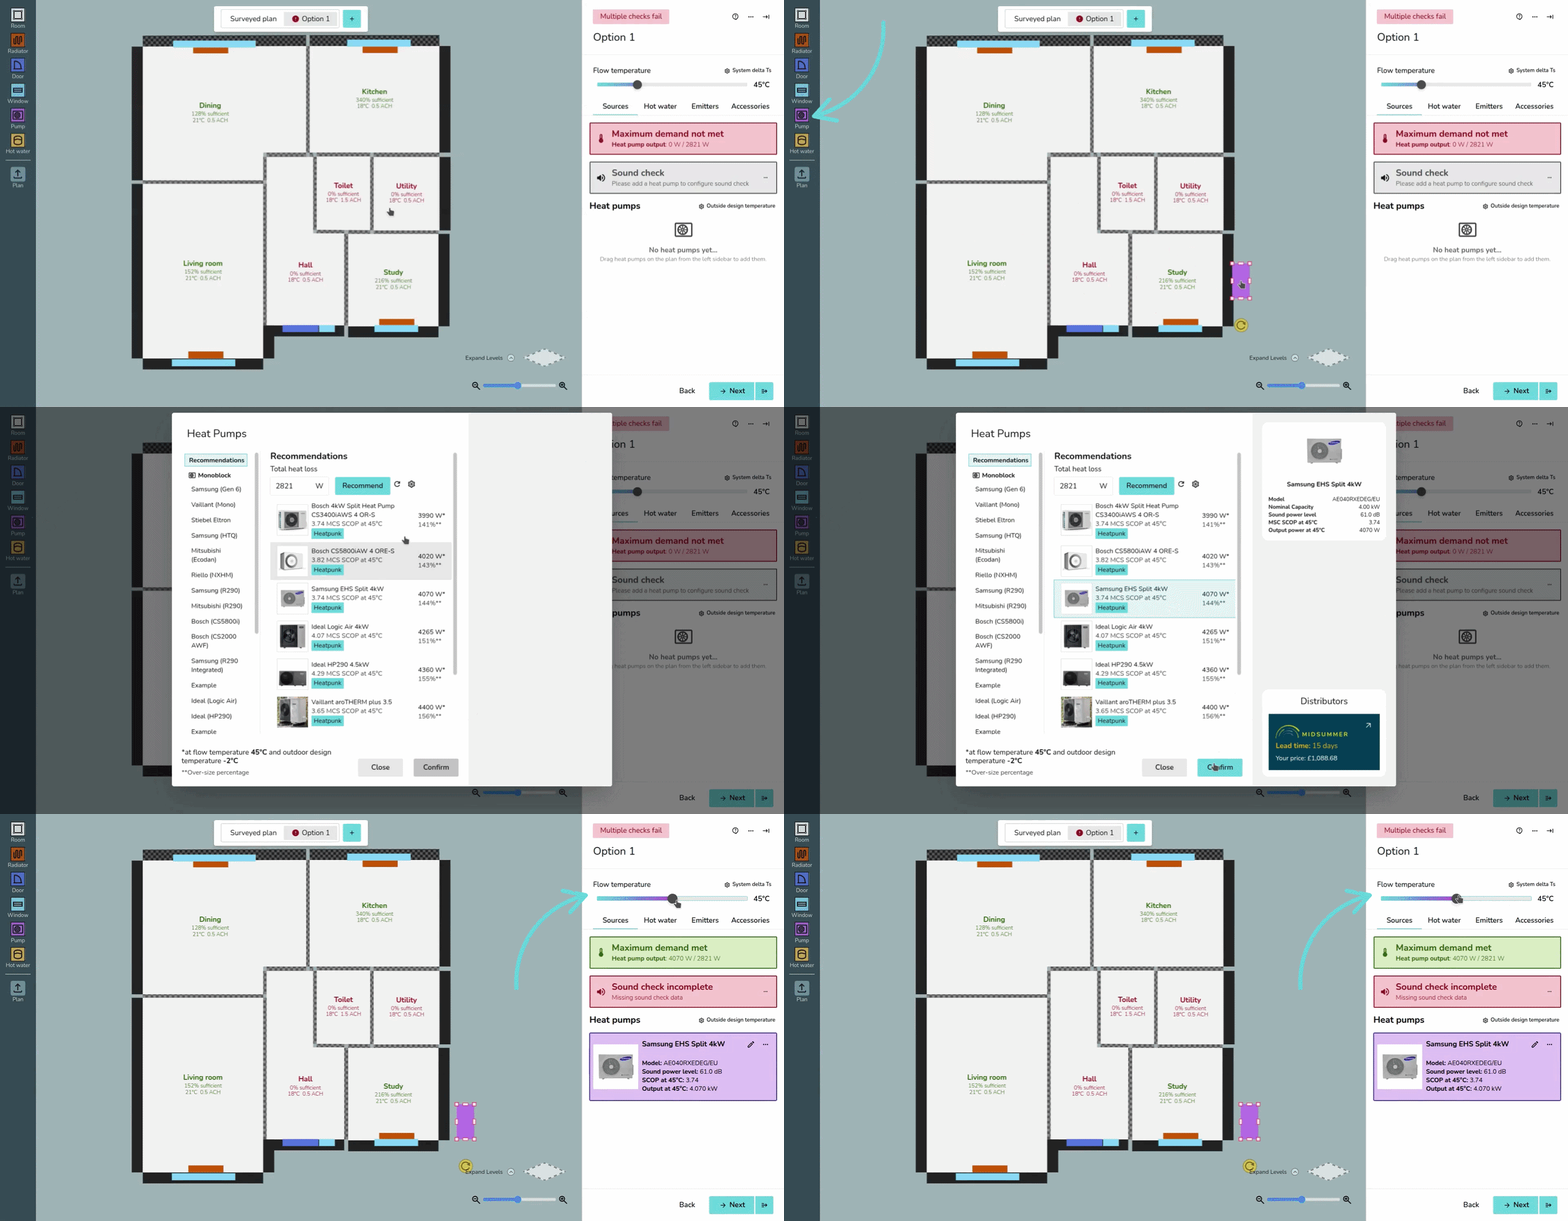
To add a heat pump, while on a design option drag and drop a Pump from the left-hand sidebar. Once you have placed these on the floor plan, a menu will pop up to specify the model.
Sound check (UK only)
heatpunk.co.ukThe sound check status can be seen on the right-hand side. Click the ⋯ three dots and then the name of the heat pump(s) where the sound check hasn't been completed.
Read more about selecting a heat pump and completing the sound check.
Hot water
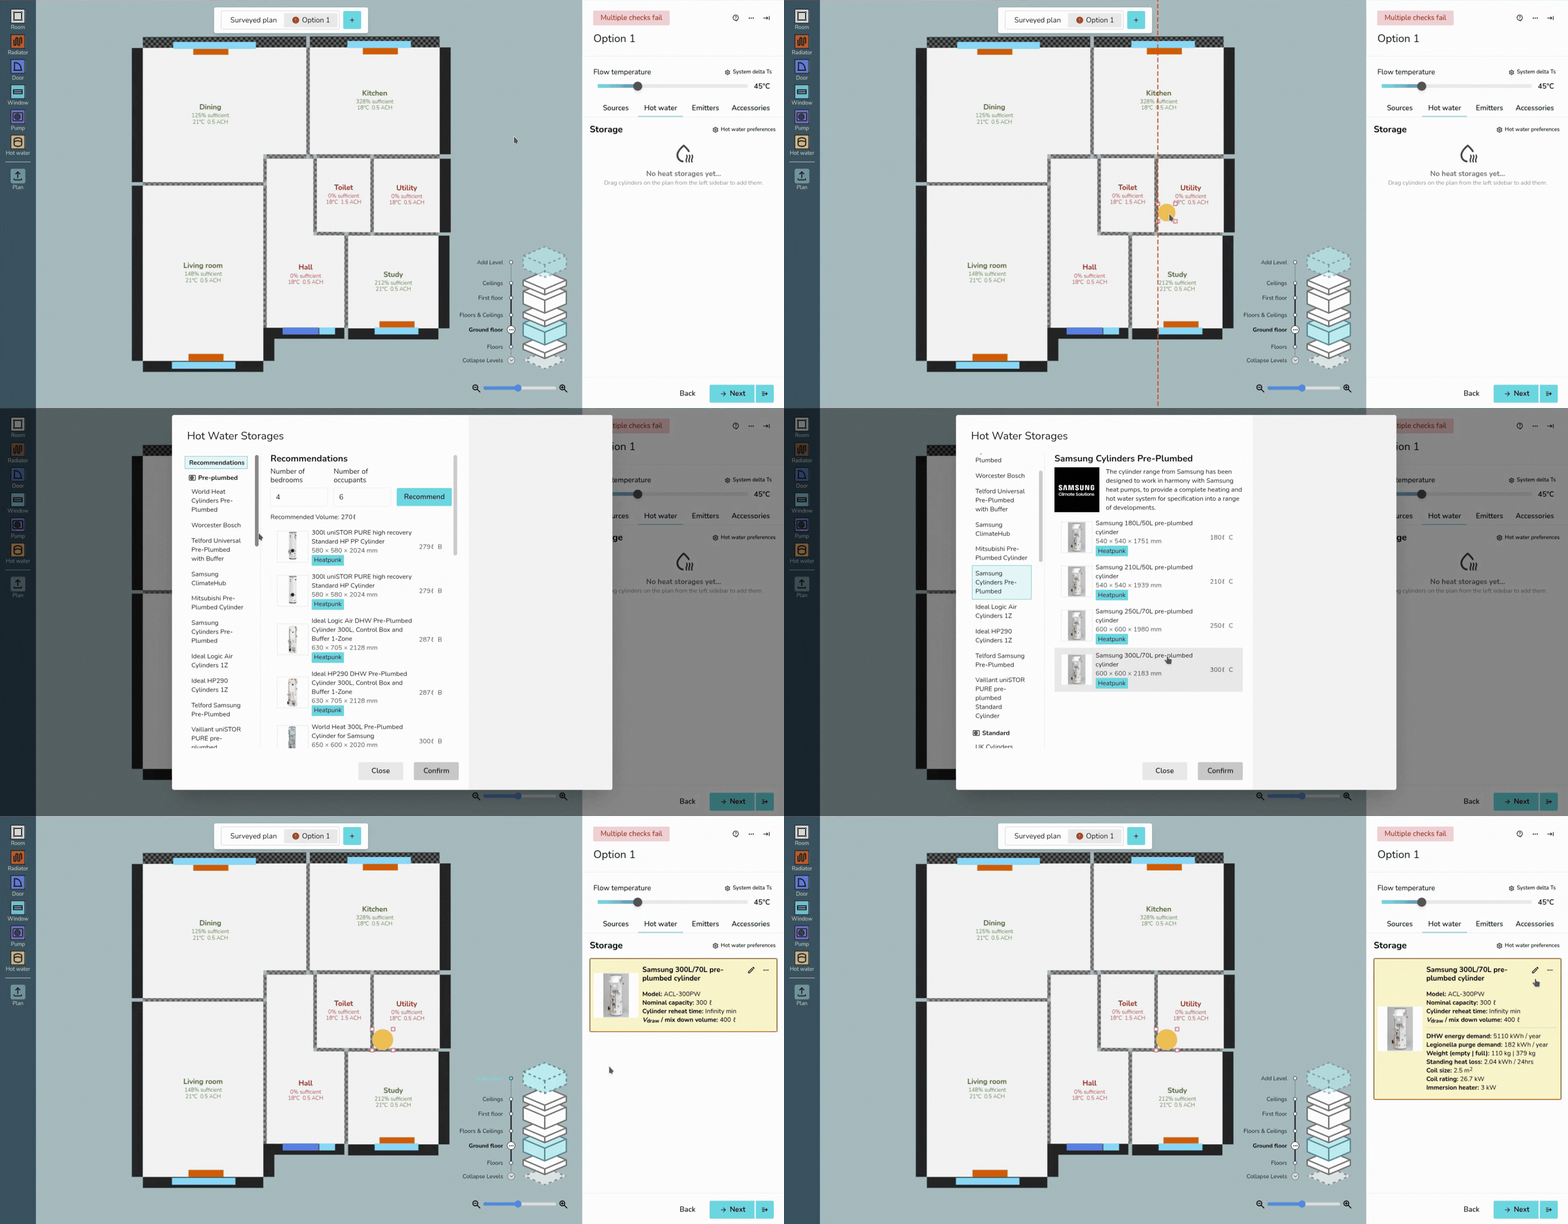
Similarly, to add a hot water storage, drag and drop from Hot water on the left-hand sidebar. A menu will then appear to specify the model.
Read more about specifying hot water storage, including information on domestic hot water calculations.
Emitters
From the Emitters tab, you can see the existing, removed and new emitters for each room. You can click the 🡥 icon on each room to see the full room details.
You can also add room overrides by clicking the exclamation icon and inputting the reason for the override.
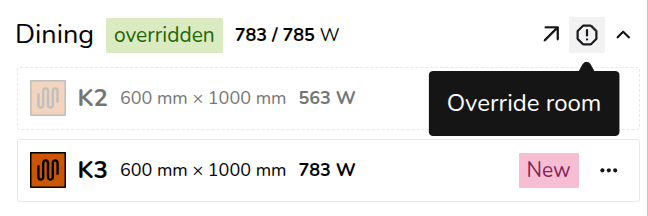
To model emitter upgrades follow the steps outlined below.
- To upgrade existing radiators, click on the radiator from the plan and click upgrade. Input the new radiator details and save.
- To replace an existing radiator with UFH, delete the radiator from the floor plan and add underfloor heating by clicking the 🡥 icon on each room. Click Add underfloor heating and input the output and m2.
Read more about emitters.
Accessories
Once you have added both a heat pump and hot water storage, a menu will appear to add any accessories. If possible, compatible accessories will be automatically selected. This step can be skipped.
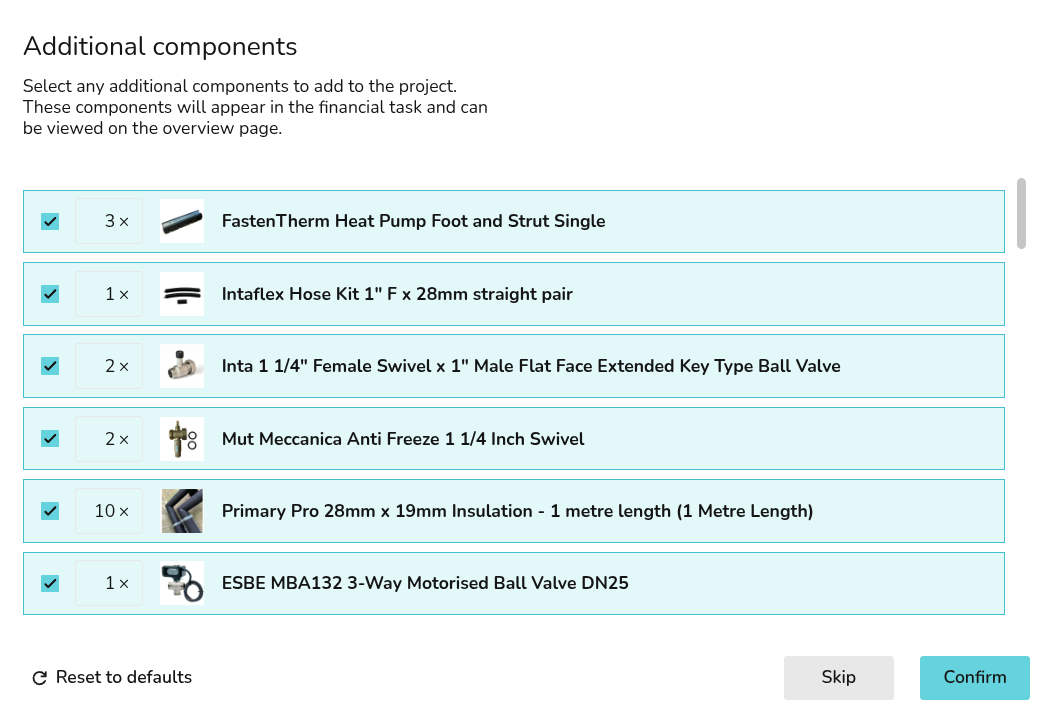
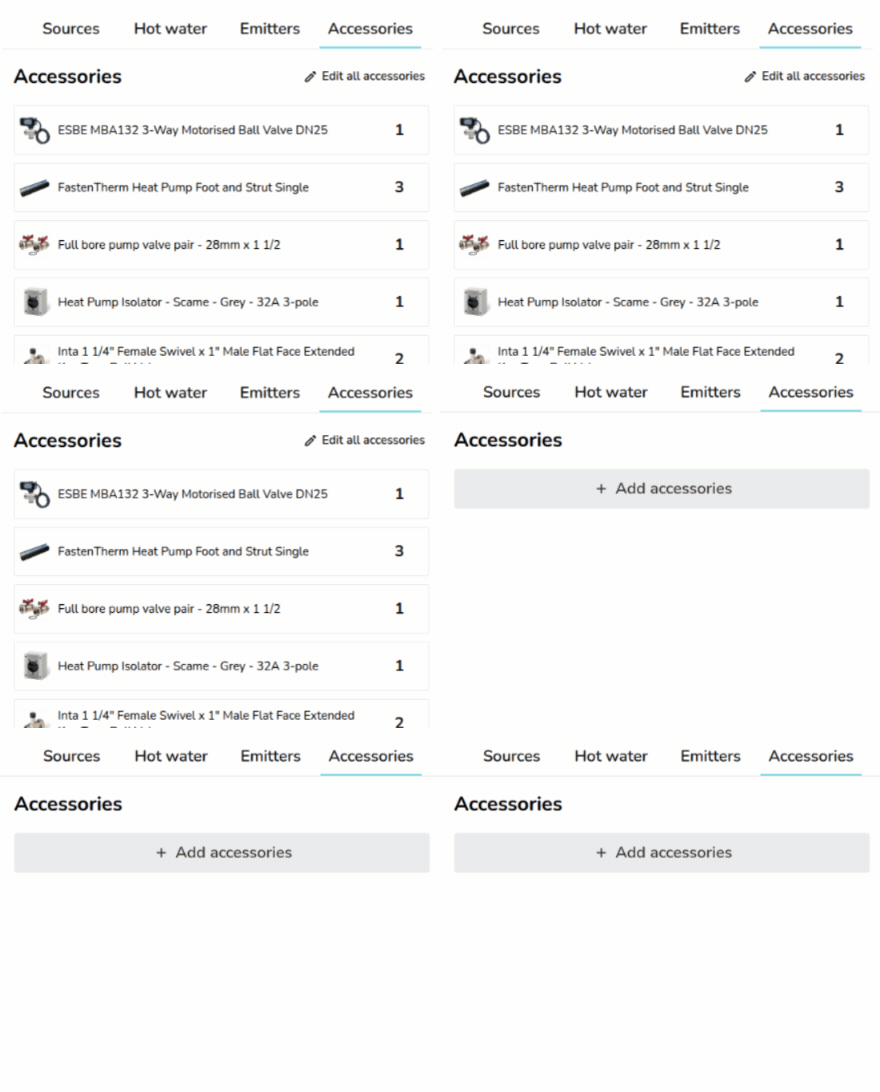
To re-open the accessories menu, navigate to the accessories tab and click + Add Accessories. If you already have accessories selected, click Edit accessories.
Still Need Help? / Want to know more?
Contact Support: If you've got further questions, get in touch with our support team at help@heatpunk.co.uk (UK) or help@heatpunk.ie (IE). If you are experiencing a bug, to help us look into your issue faster, please include the email address of your account, the name of the project and screenshots of any unexpected behaviour.